Upcoming webinar on 'Inforiver Charts : The fastest way to deliver stories in Power BI', Aug 29th , Monday, 10.30 AM CST. Register Now
Upcoming webinar on 'Inforiver Charts : The fastest way to deliver stories in Power BI', Aug 29th , Monday, 10.30 AM CST. Register Now
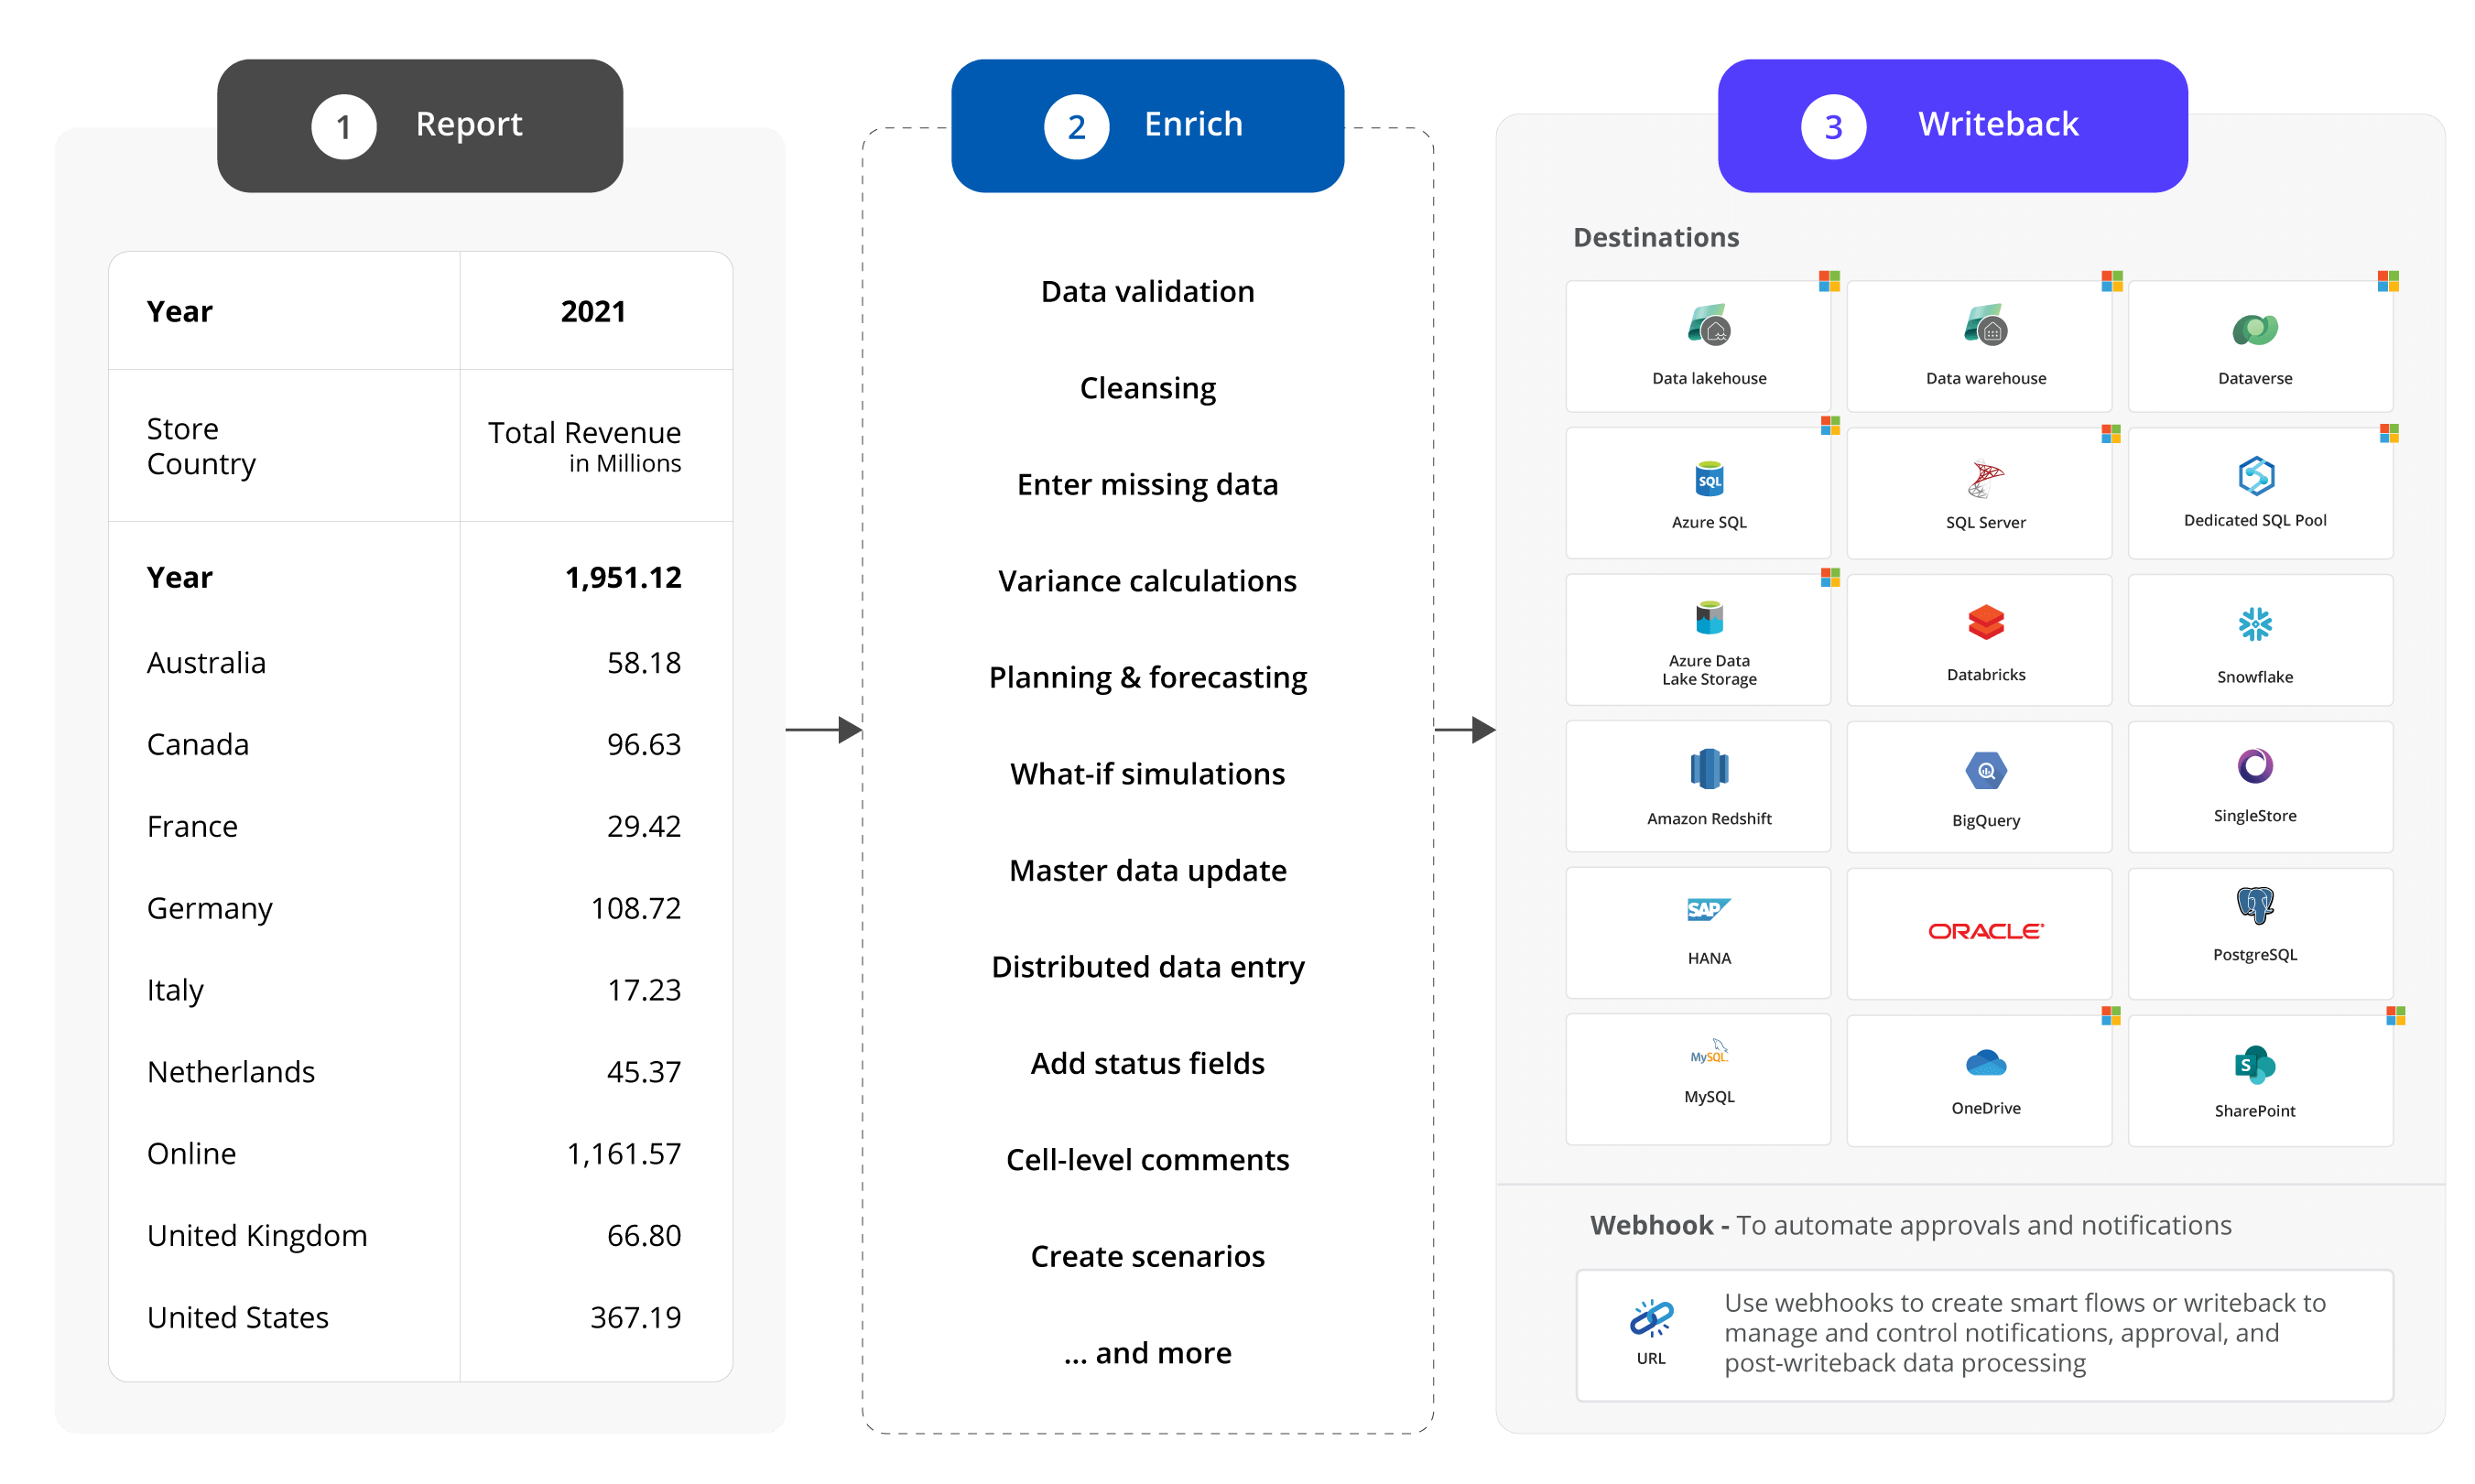
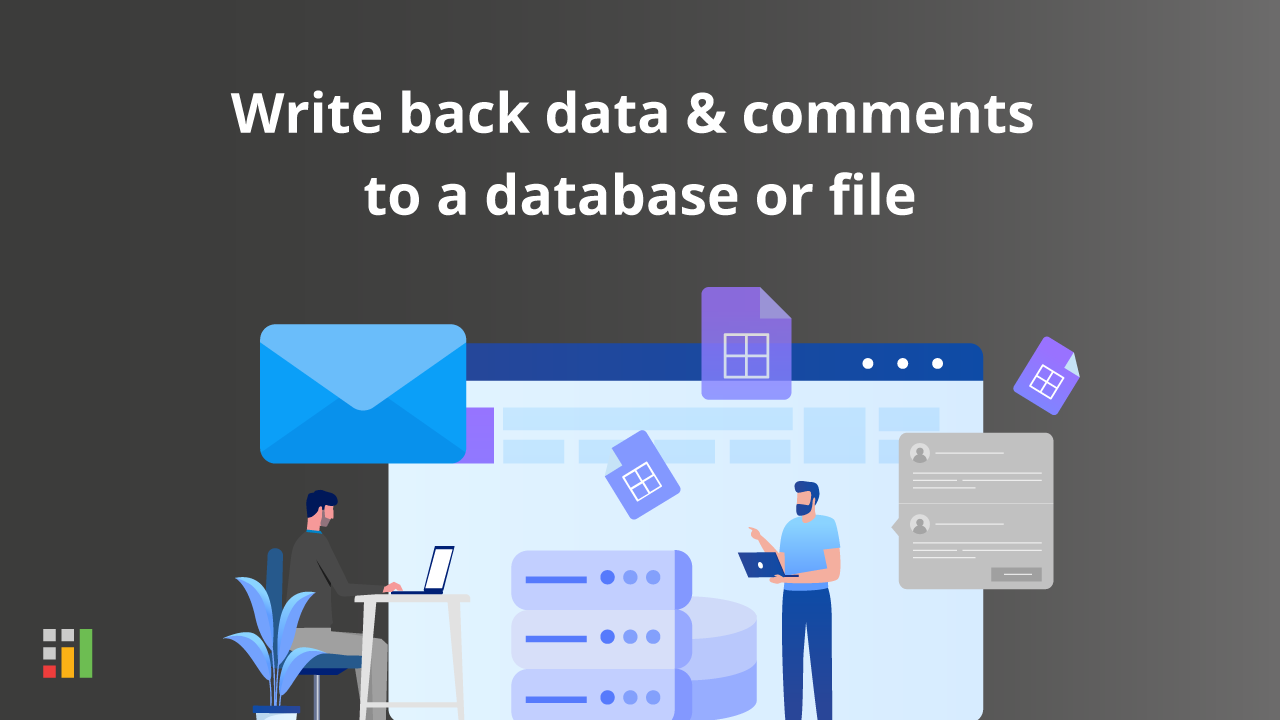
Many organizations need robust data writeback functionality from reporting tools such as Power BI, Tableau, Spotfire, and Qlik for several reasons. The use cases include some of the following where changes made to a report need to be written back to a database, data warehouse, cloud platform, or shared drive:
Date & Time : 07 Feb 2024 , 10 AM GMT I Speaker : Miguel Felix, Data Consultant
A standard option to write back data from a Power BI report to a database is by integrating Power Apps and Power BI (using the PowerApps visual). We explored this option and concluded that integrating PowerApps + Power BI is more complex than it should be for business users and more restrictive for advanced use cases.
A second option is to use a third-party visual for Power BI that provides write-back capabilities. However, these are IT-centric implementations that come with limitations such as the following:
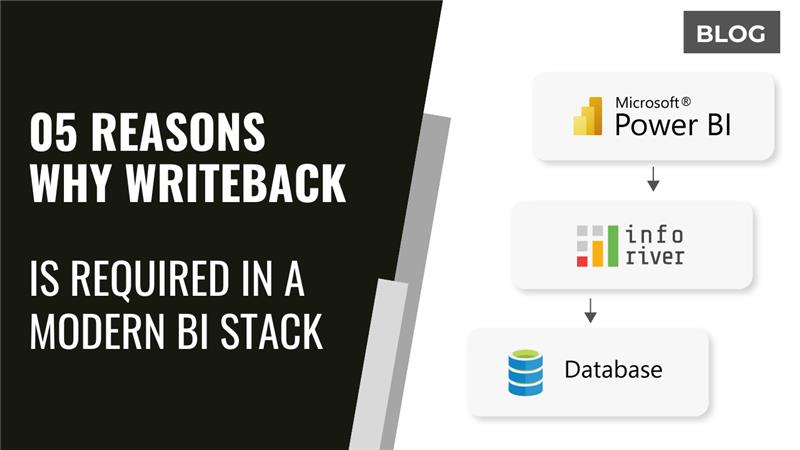
A third option is to use Inforiver visual for Power BI, which addresses all the shortcomings listed above. Inforiver offers the most comprehensive, no-code writeback solution in the market today.
Let us explore how Inforiver's writeback capability unlocks new use cases for you in Power BI.


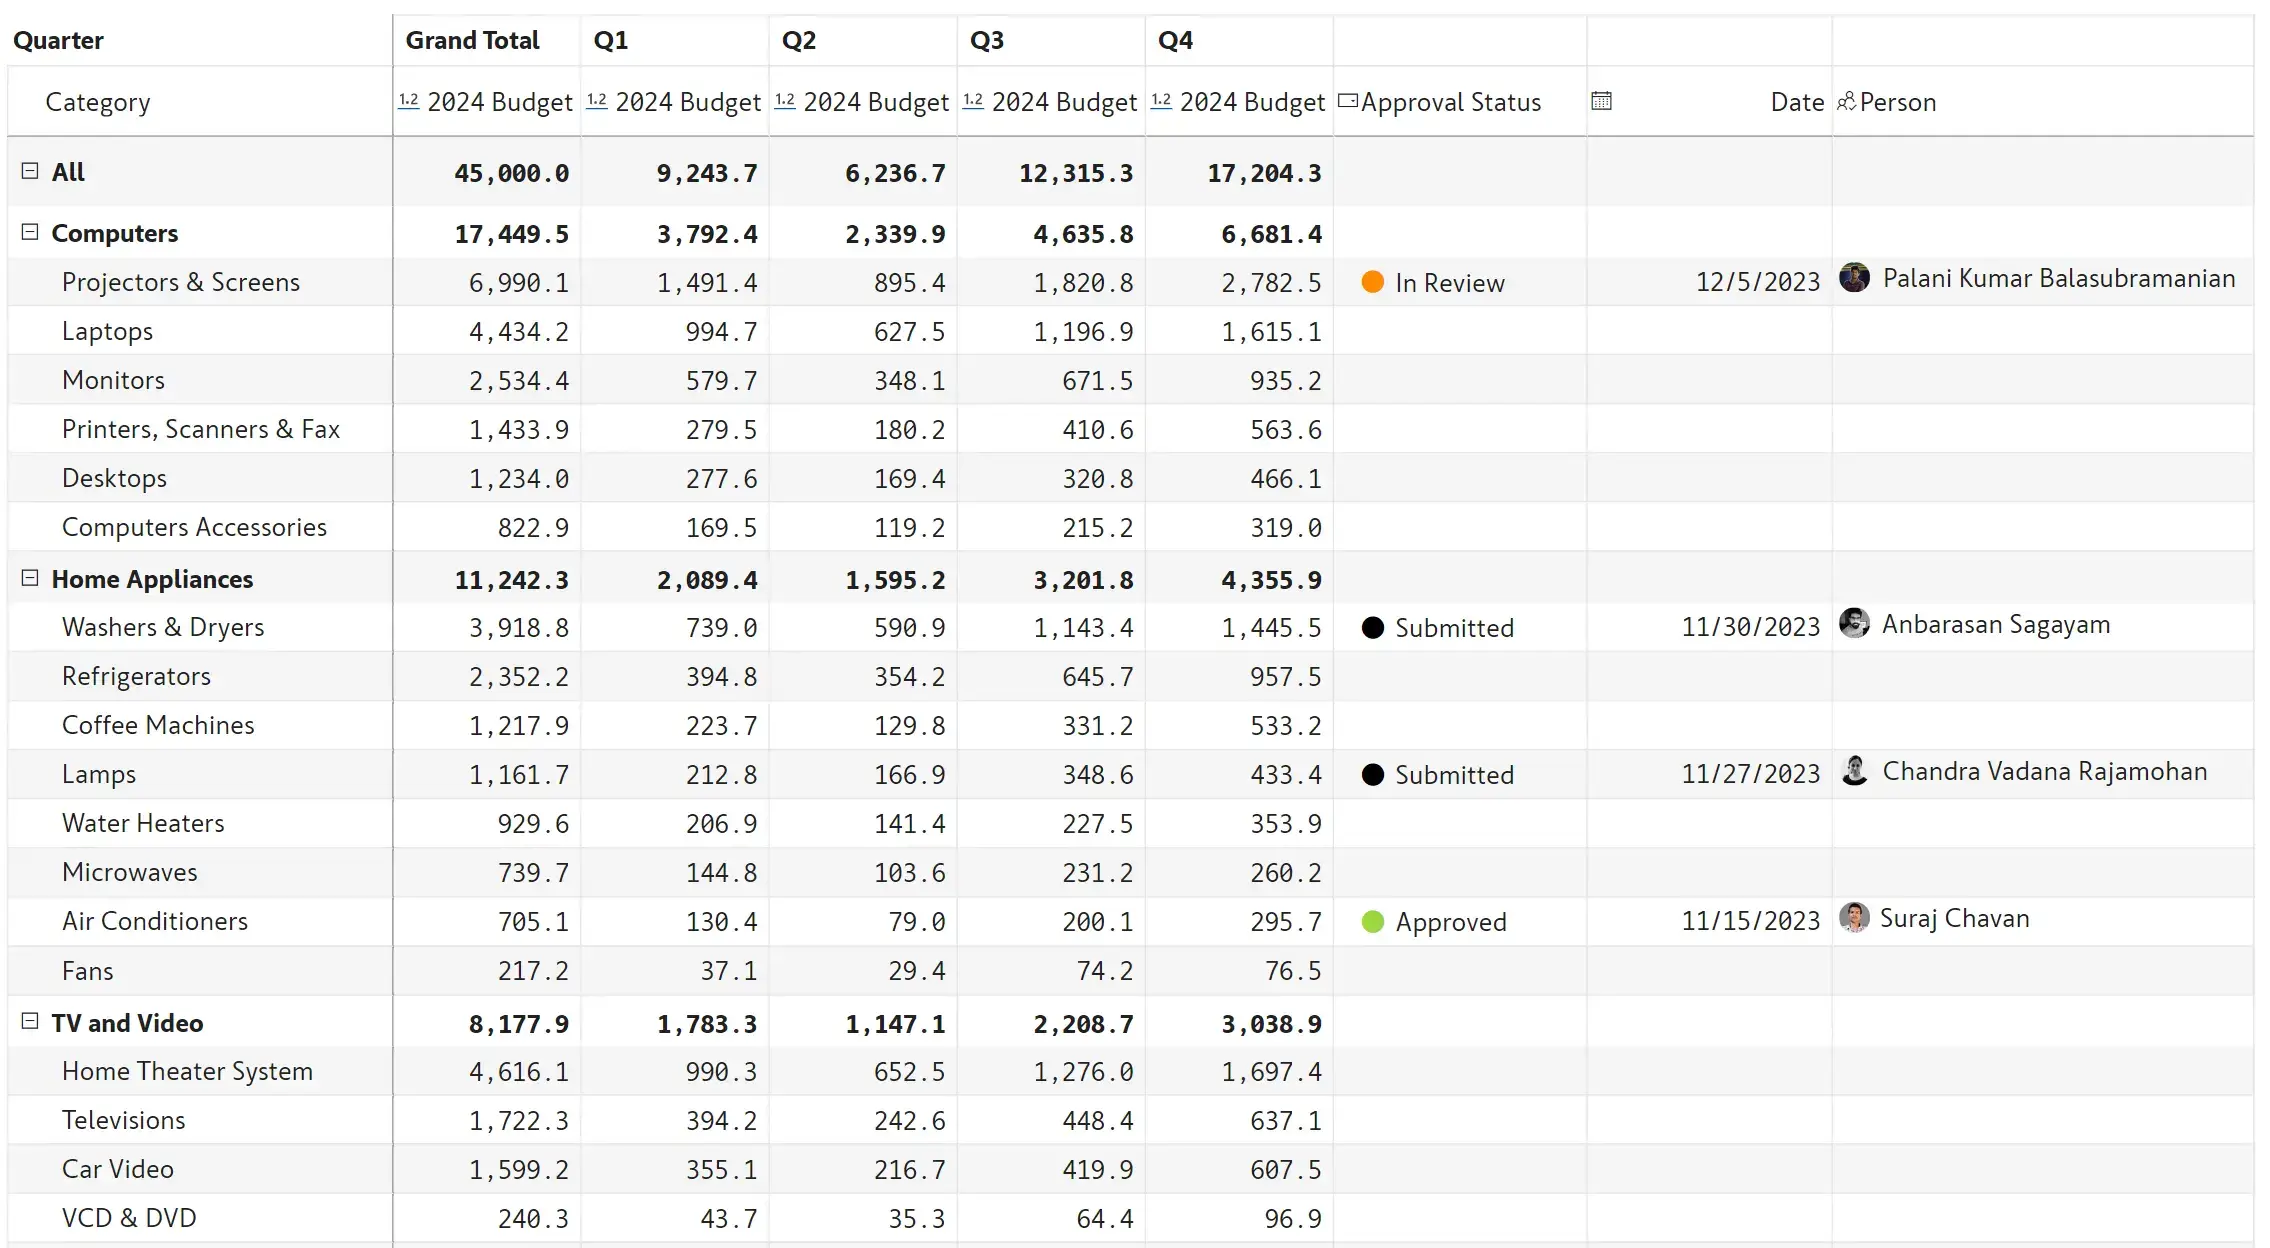
With Inforiver, report designers and consumers (in reading view) can insert, edit, and update values simultaneously in Power BI reports. Inforiver provides seven (7) different options to enter data manually - numeric values, text, single-select, multi-select, check box, date, and person.
There are two other columns – last updated at and last updated by - which keep track of the time and user who made the last change at the row level.
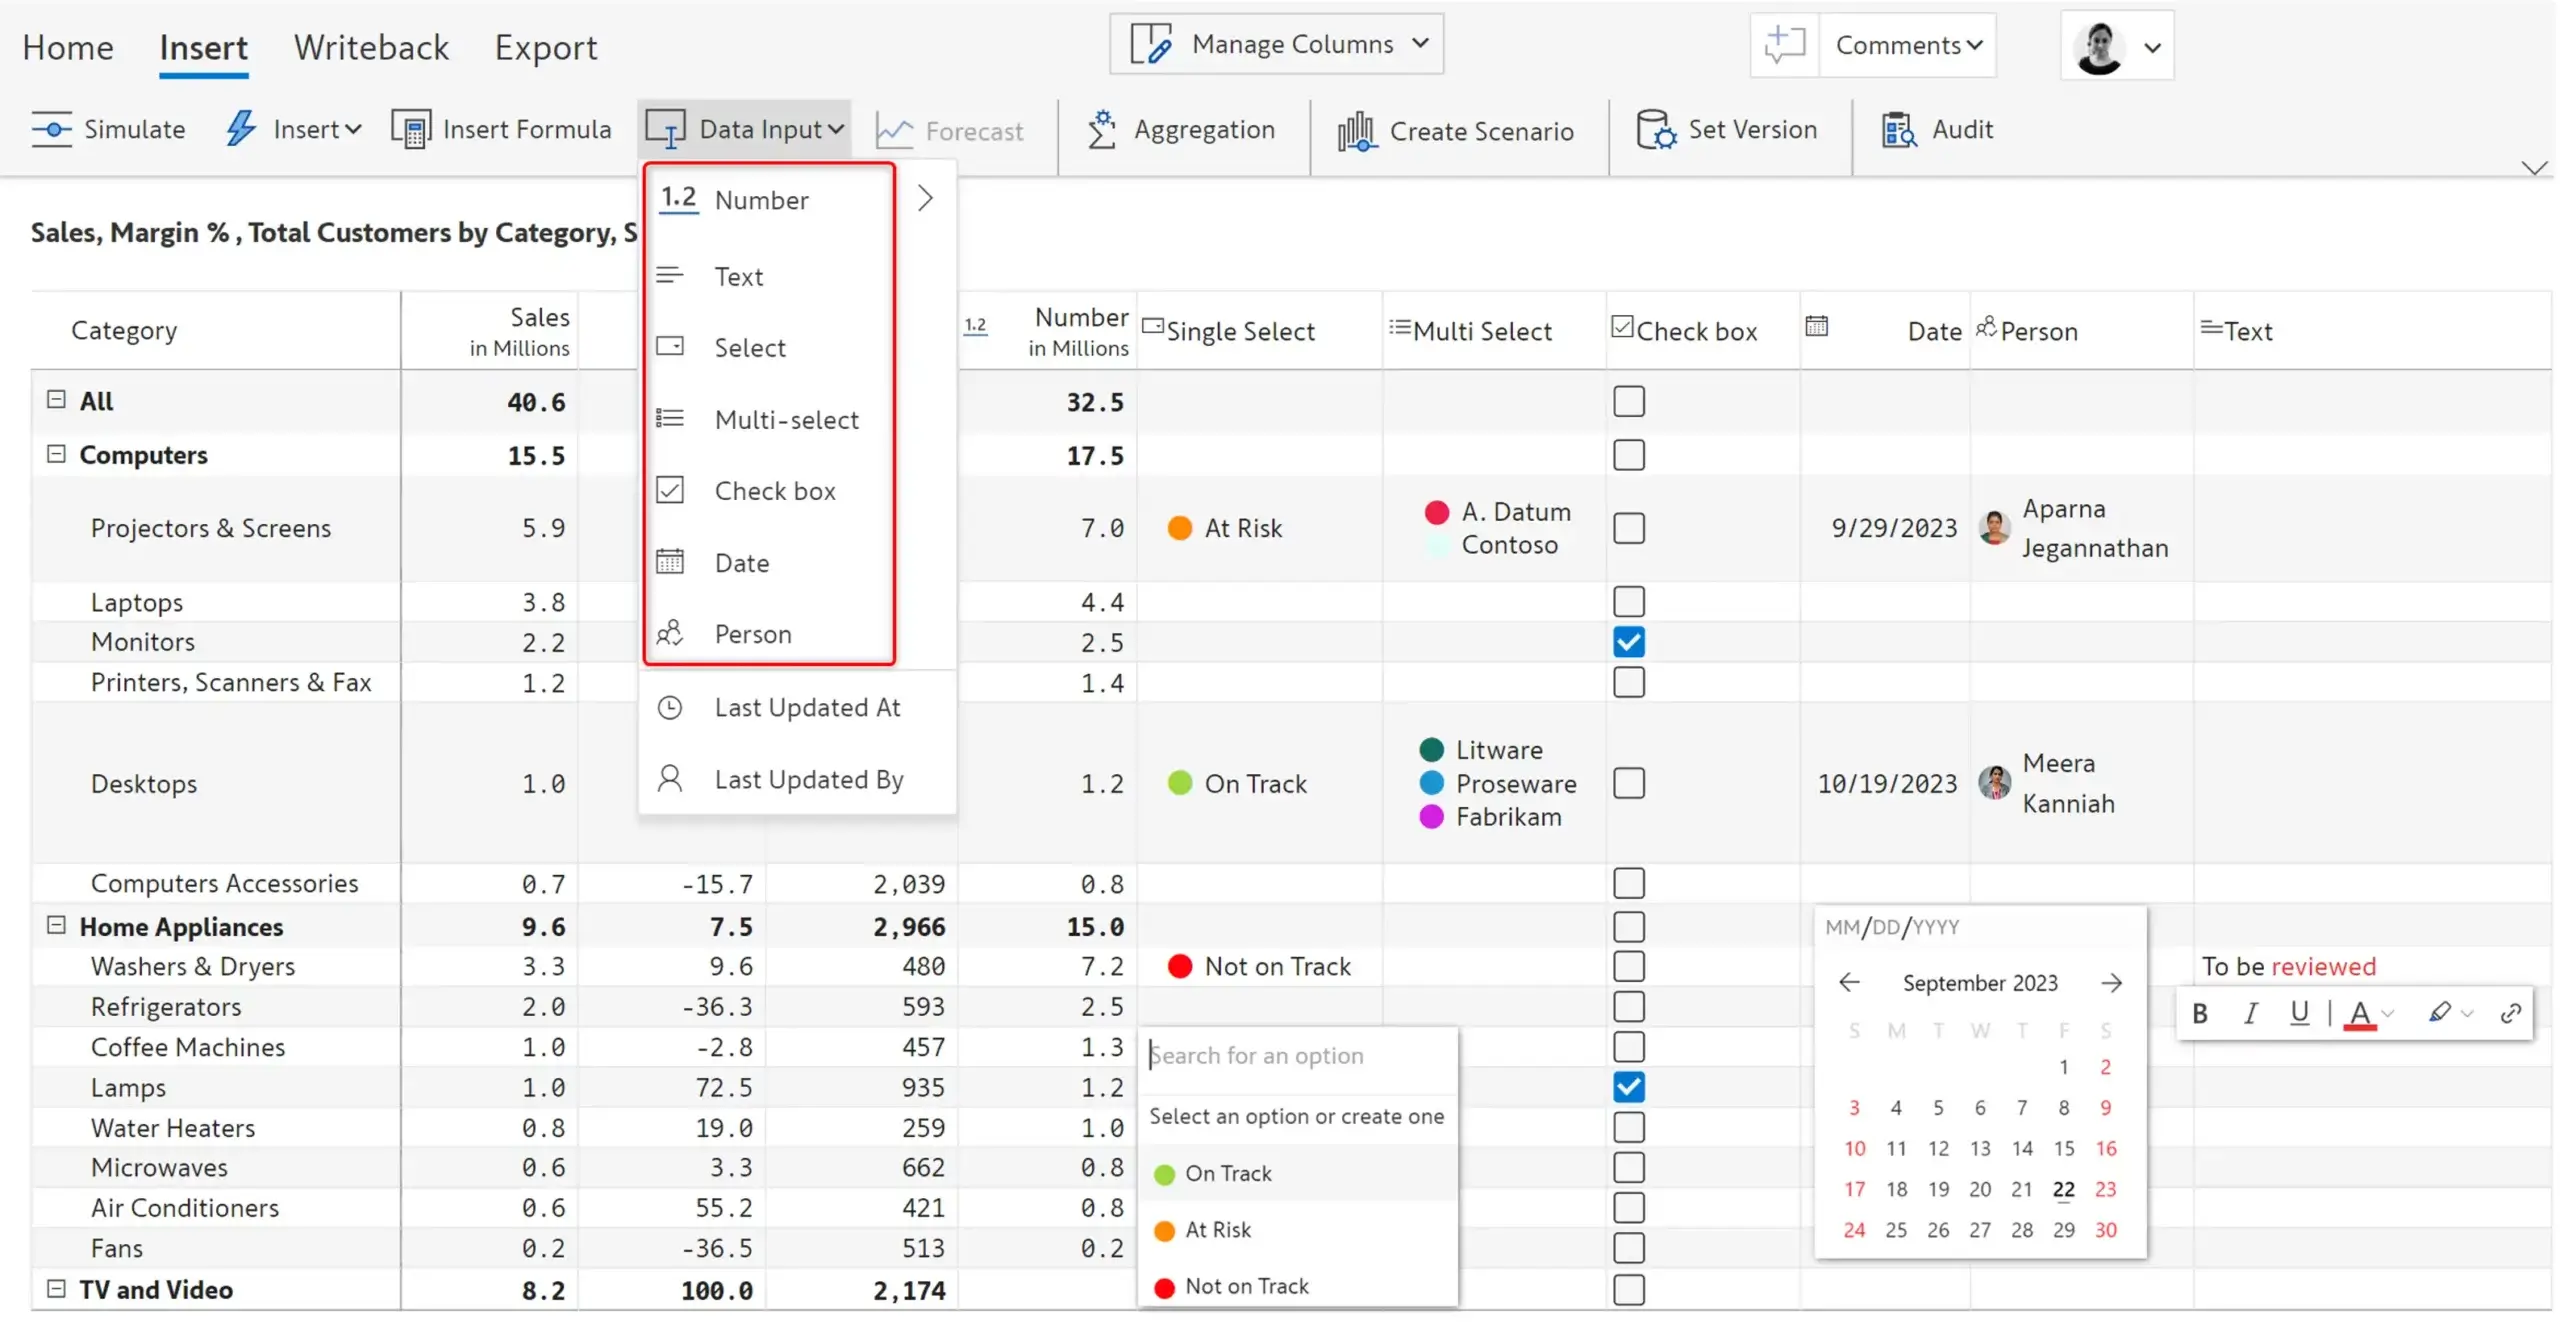
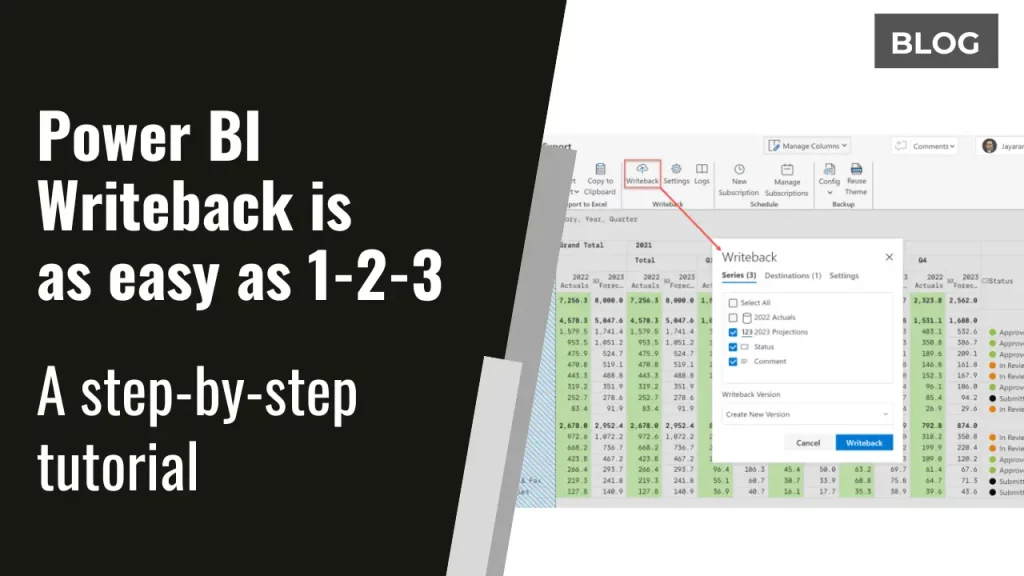
Inforiver provides an Excel-like cell editing experience – you can double-click a cell and enter values or formulas. All changes are automatically tracked in an audit log.
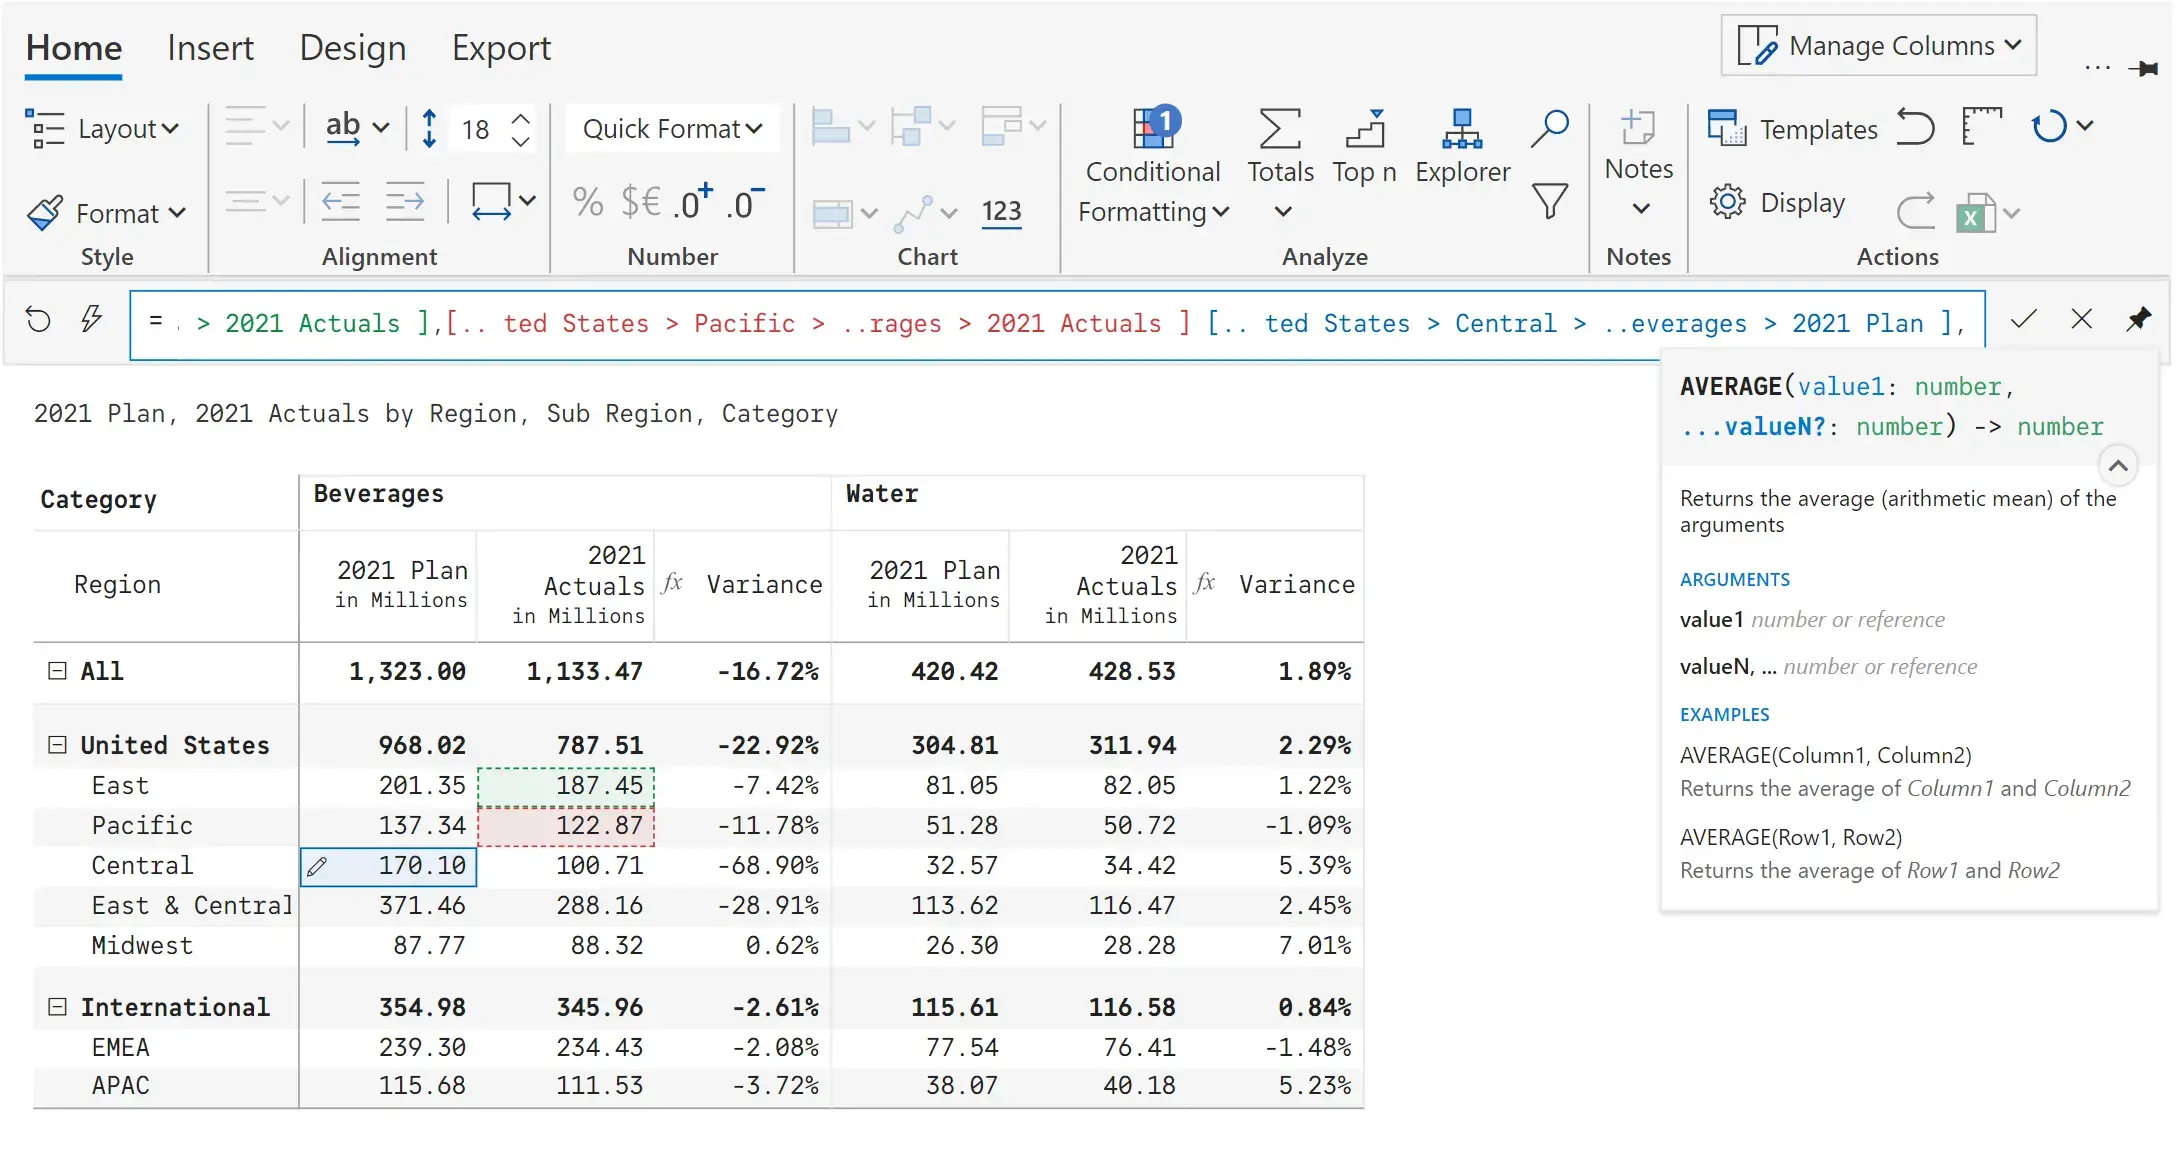
Inforiver provides a no-code visual formula engine that supports 70+ functions (logical, math, text, date, boolean, etc.) and identifiers. You can use a spreadsheet-like formula bar to edit cell values or formulas referencing other cells. You can also insert static rows and columns to manually type in values (supports scaled entries) or define calculations using the formula editor.

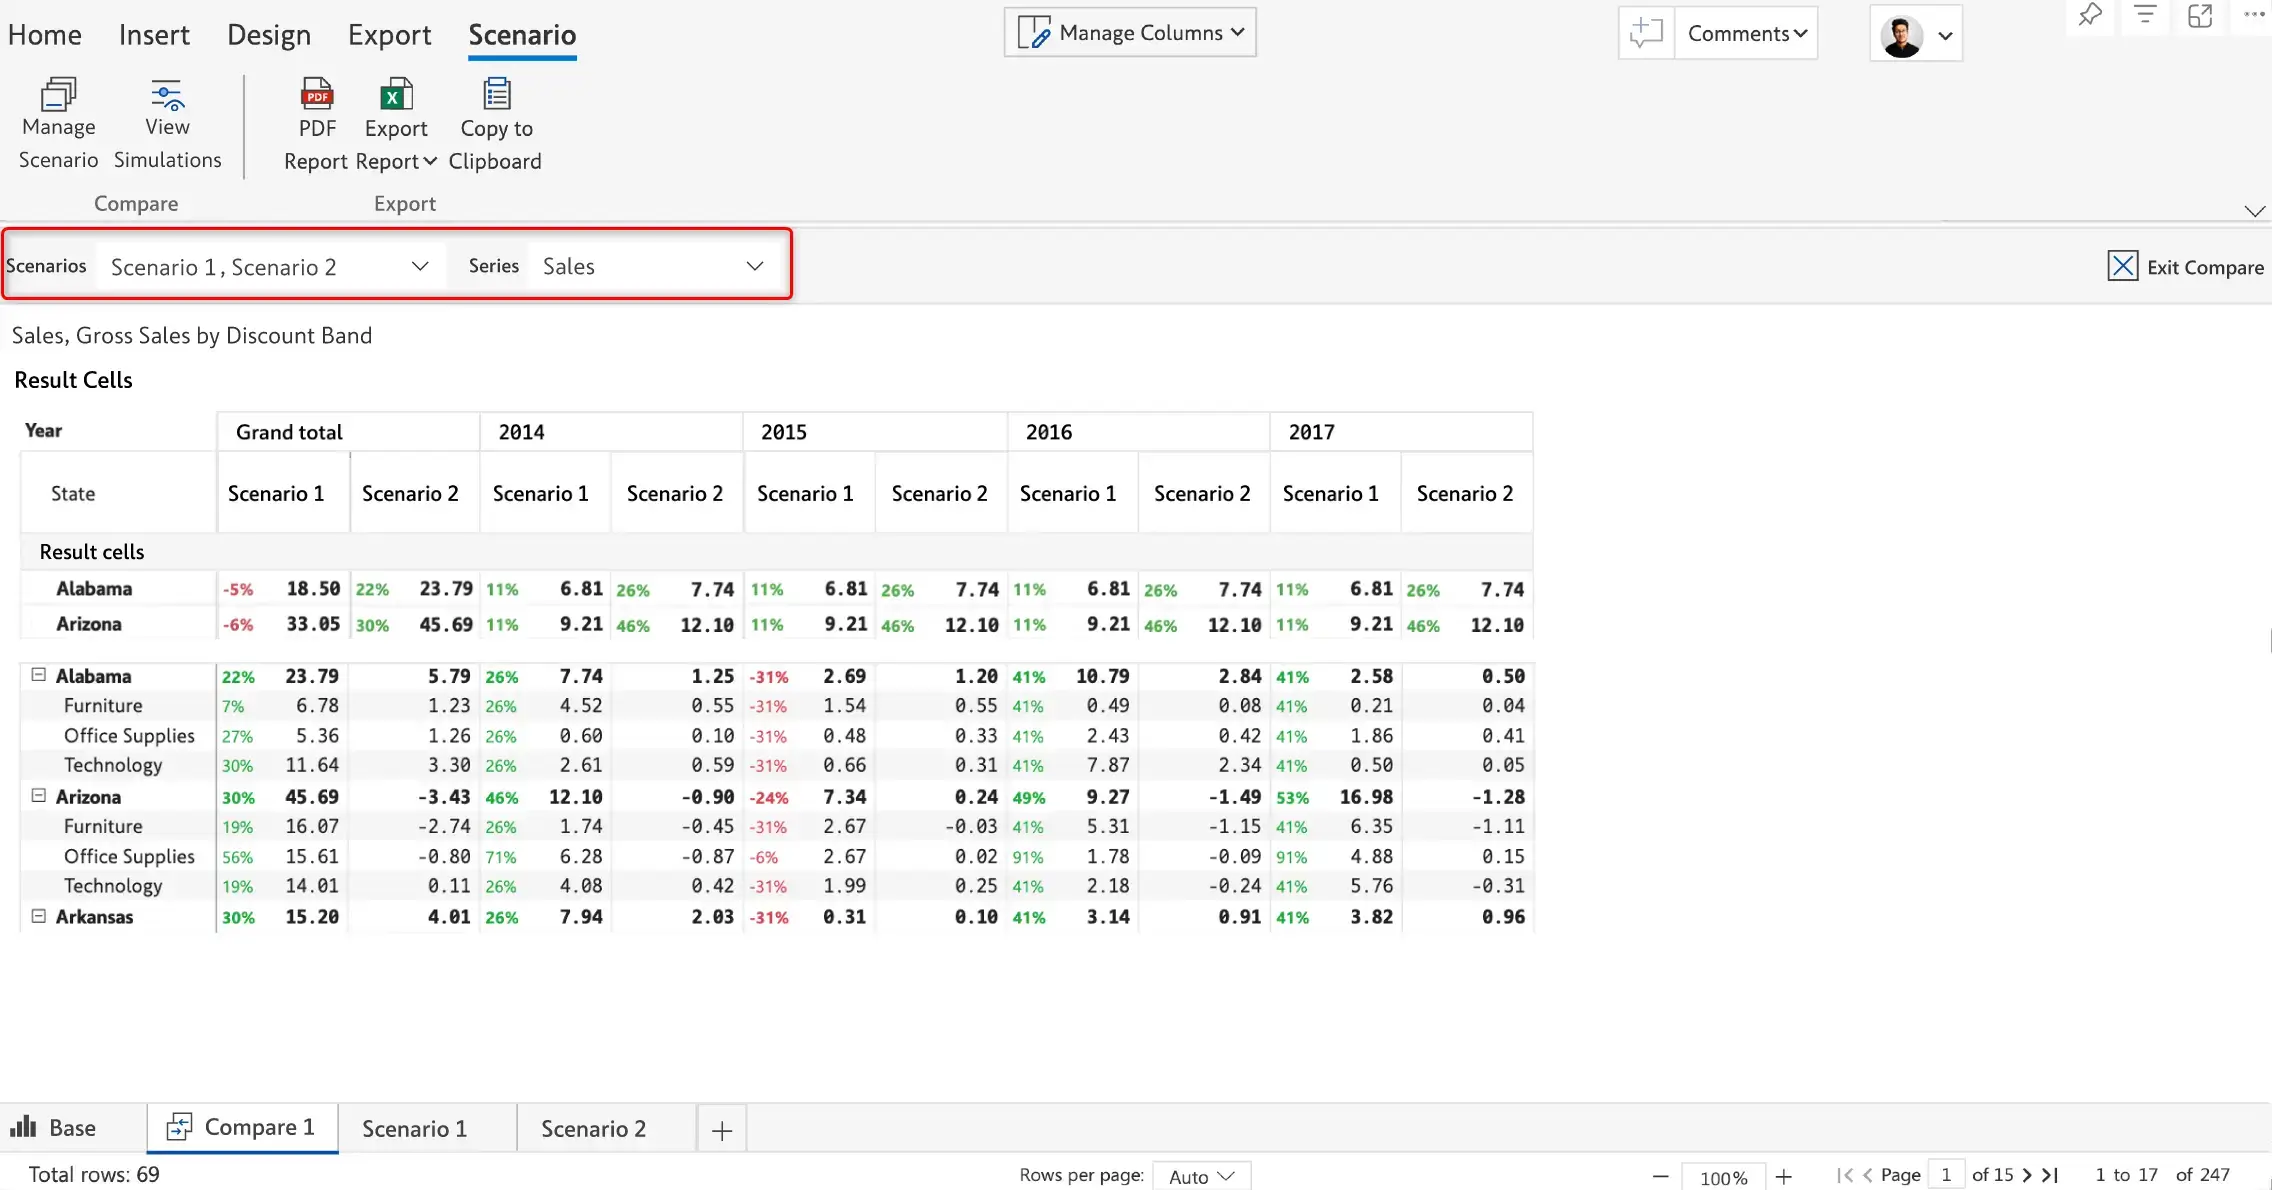
You can perform what-if analysis on the fly using a graphical slider and make finer adjustments. Simulation done at the org level gets proportionally allocated to its constituent products and geographies (top-down simulations), whereas simulations at granular levels are rolled up to the top (bottom-up simulations).

With Inforiver, you can quickly create sales forecasts, business plans, or financial budgets. You can create a budget from scratch or based on current performance and perform top-down/bottom-up planning. Inforiver supports time series forecasting for up to 5 years, including no-code rolling forecasts.
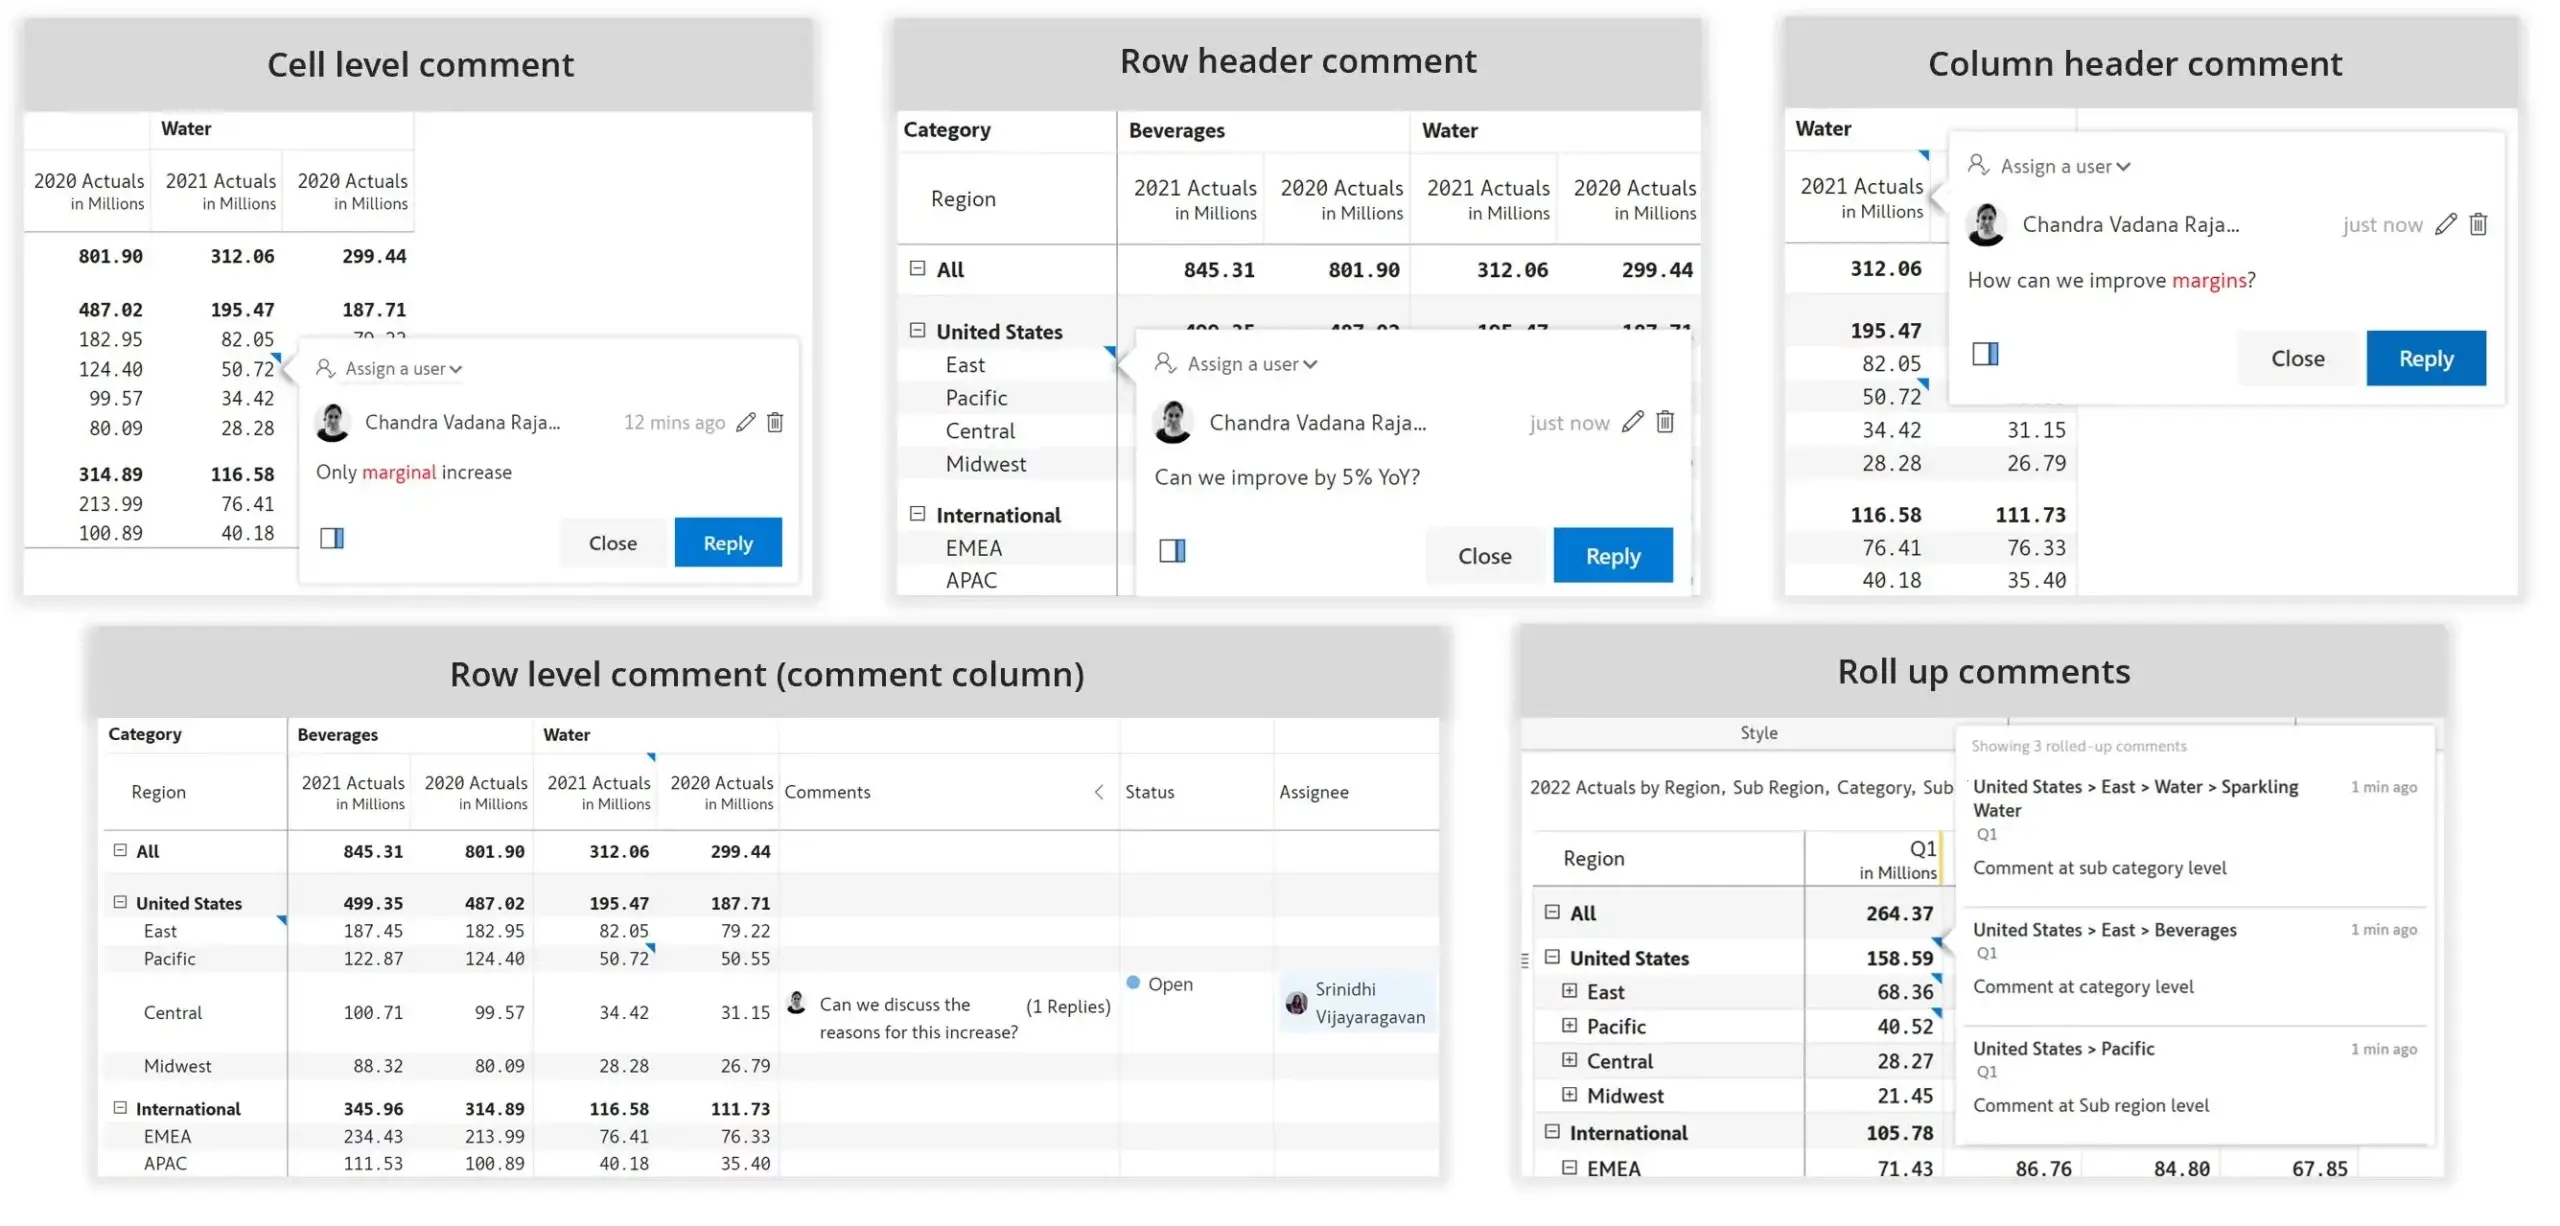
Inforiver provides several options to add context to your reports, such as cell, row, column level notes, and notes column. You can also add data-level comments (with user details and time stamps) and facilitate conversations with your peers directly from within your Power BI report.
You can create and compare multiple scenarios and write them back. Each scenario consists of a set of simulations. Scenarios can be created in both the edit and read modes and shared publicly or only with specific users in the organization. You can write back all or specific scenarios.
The current state of the report can be saved as a snapshot at month-end accounting/financial closes for future comparisons that are not impacted by source data changes and dataset refreshes. Data cannot be edited in a snapshot view.

Write back data from Power BI to Microsoft Fabric OneLake/Lakehouse, Fabric Data Warehouse, and Microsoft Dataverse using Inforiver.

Let us look at the features that make Inforiver for Power BI the most comprehensive writeback solution available today.
Each writeback instance can be analyzed using a comprehensive writeback log, which shows the writeback status, total duration for processing, time taken for each milestone, etc.

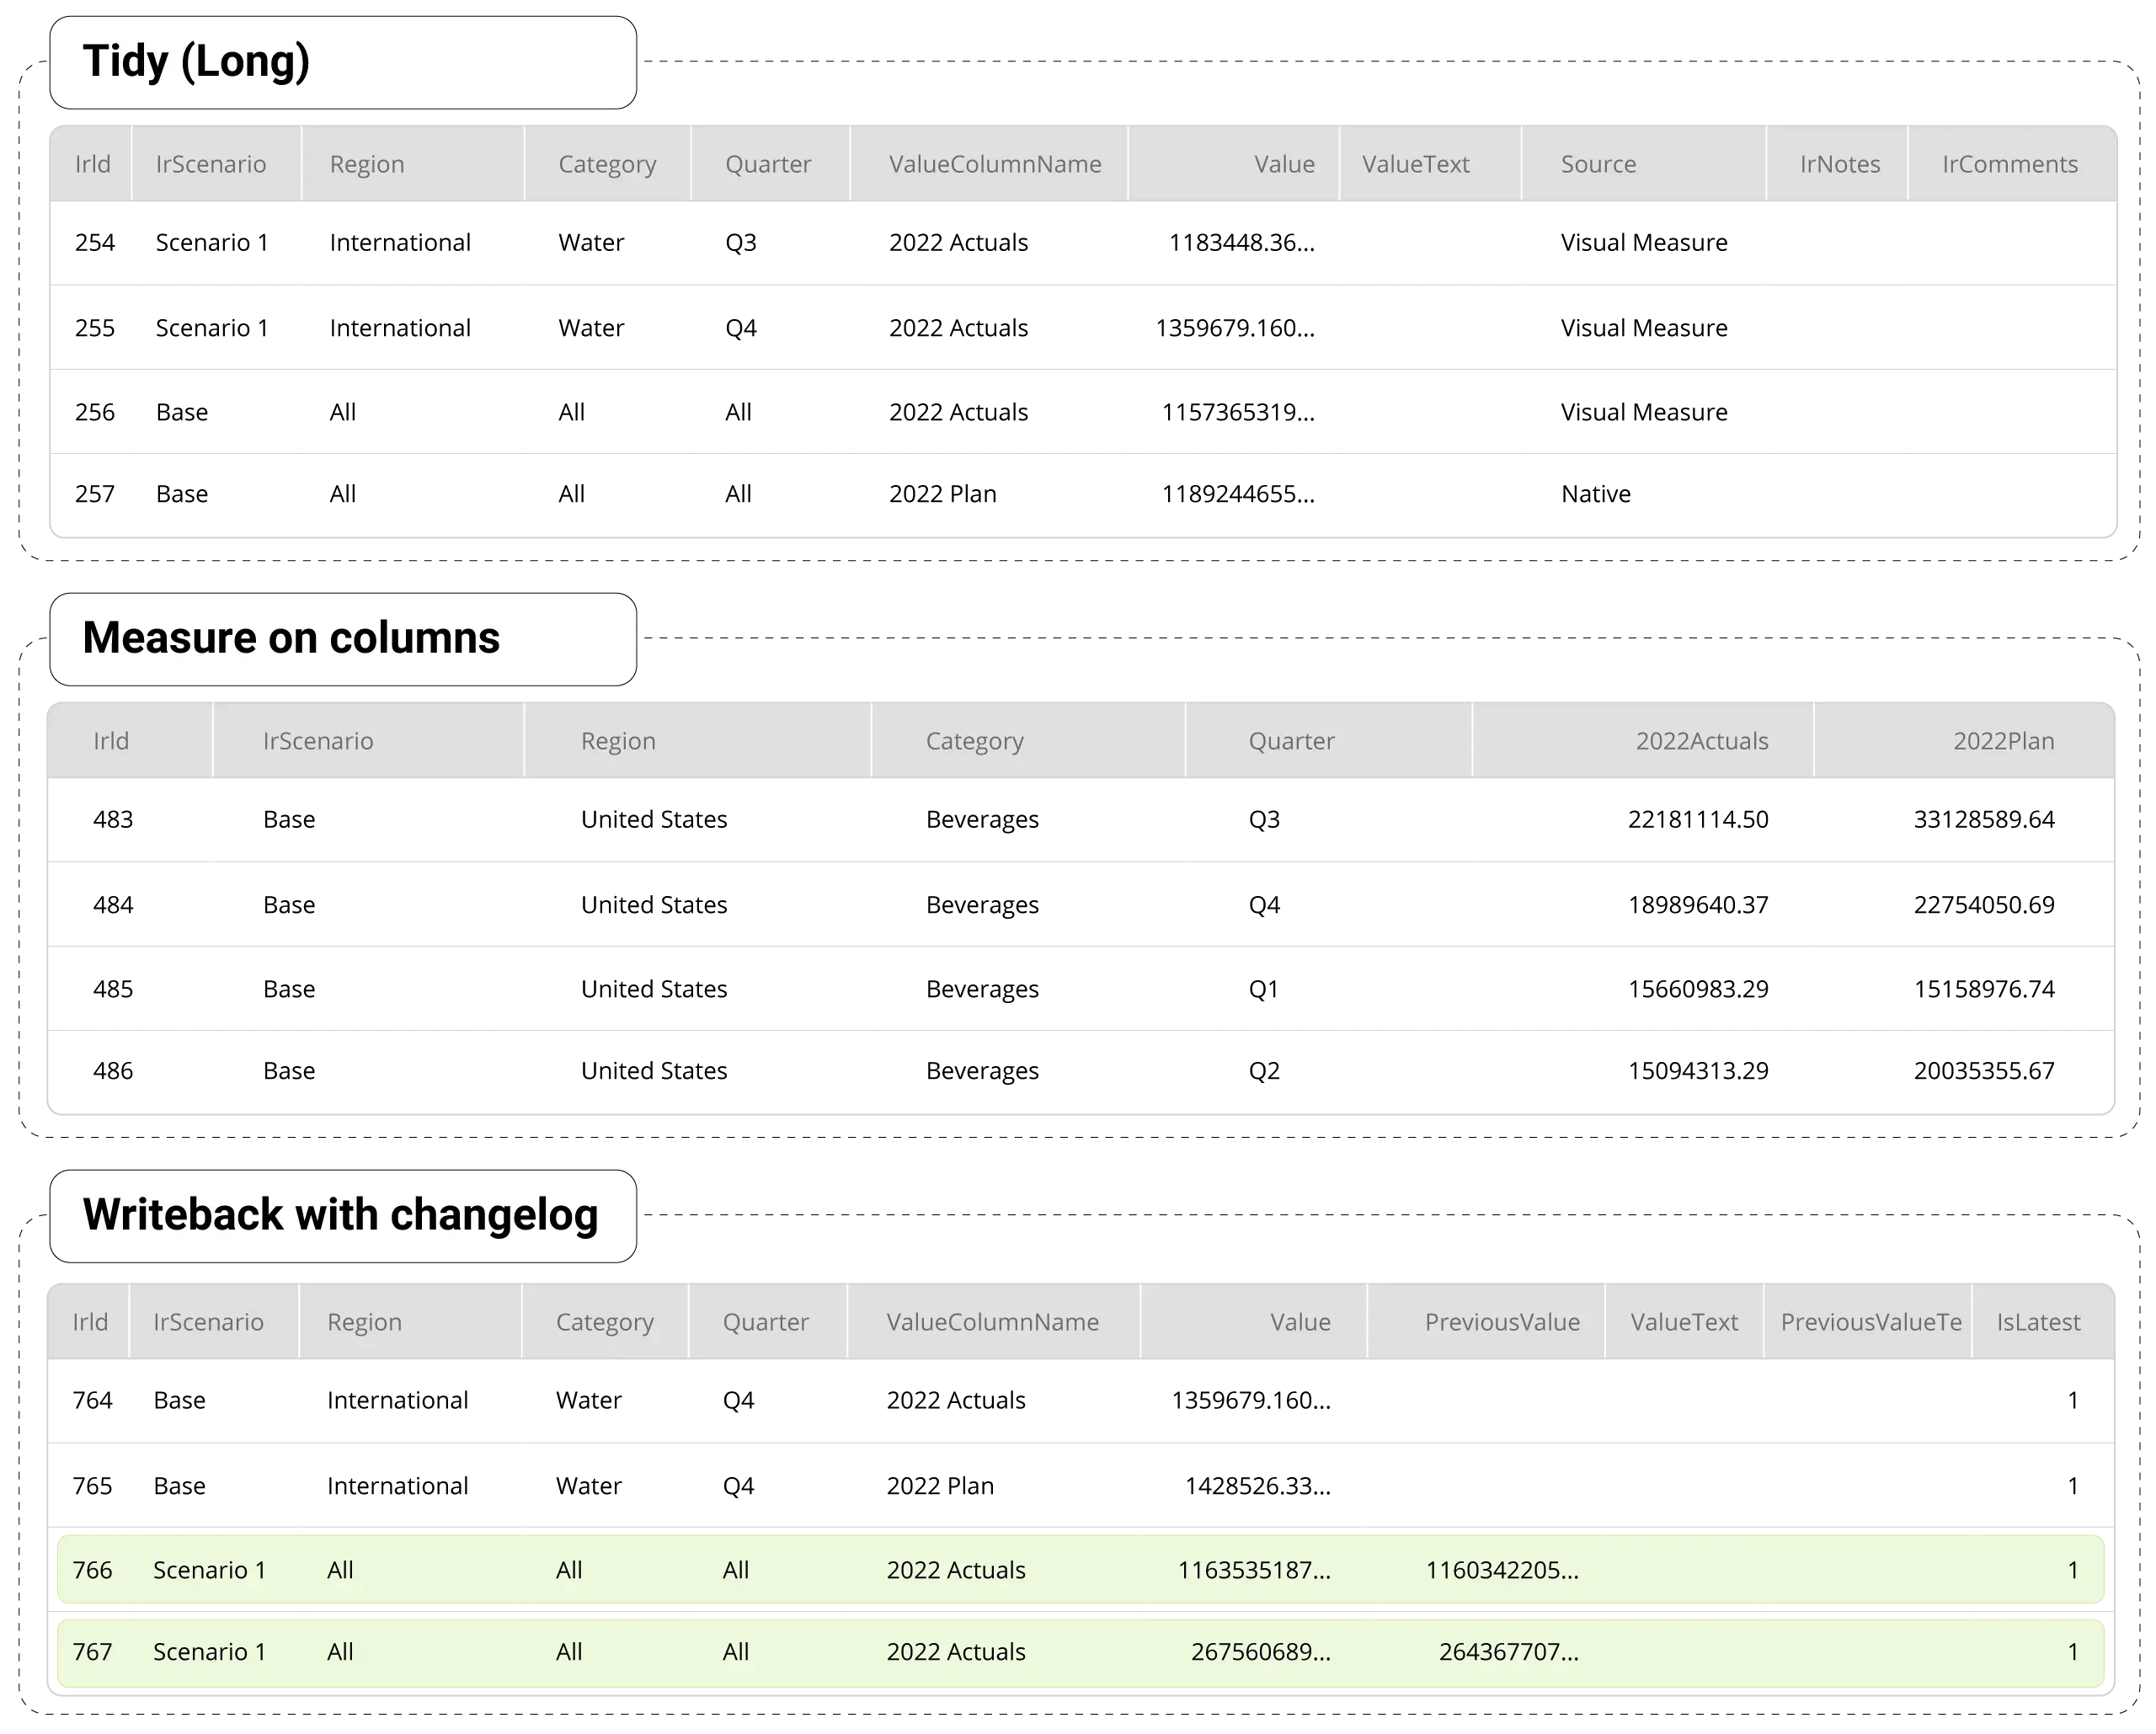
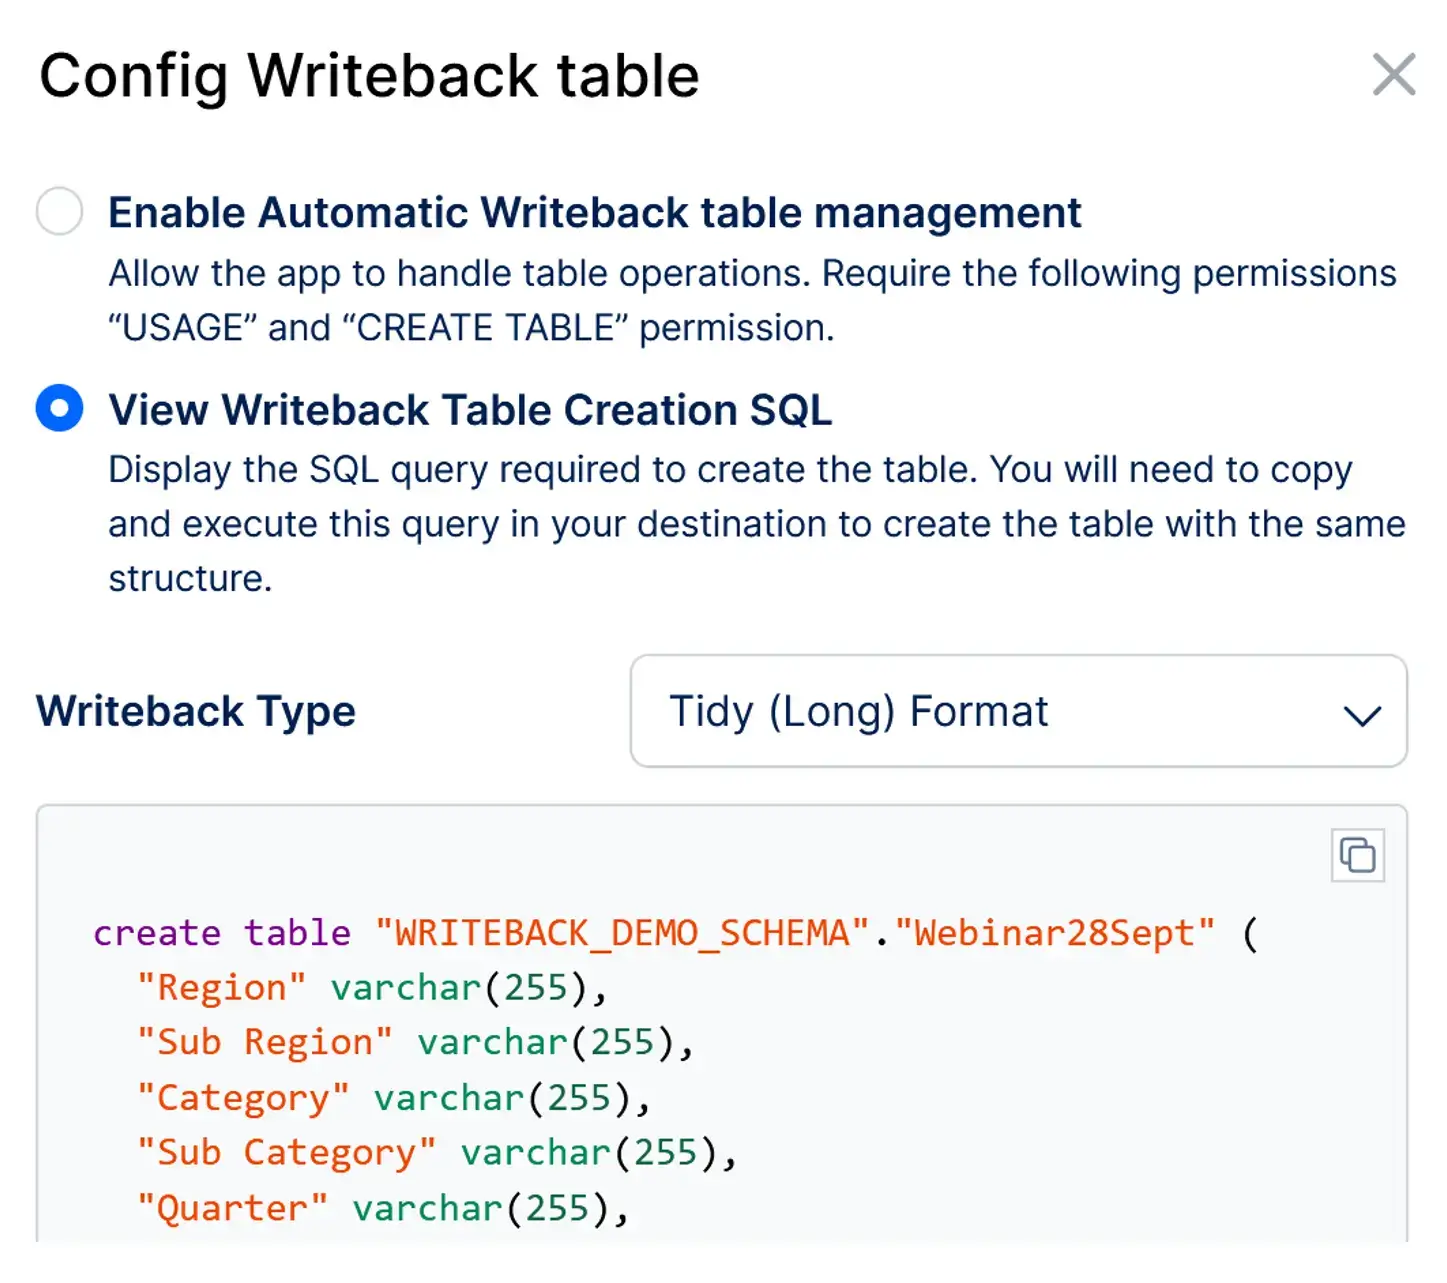
Inforiver supports three types of writeback – tidy (fewer columns and more rows – a long table format), measure on columns, and write back only the changes (delta writeback). The table formats are shown in the image below.
You can choose to write back only specific measures from your table. You determine this at runtime.

Inforiver provides several filter options to filter the records to be written back. You can limit write-back to calculated rows, rows with comments, or records that meet custom filter criteria.

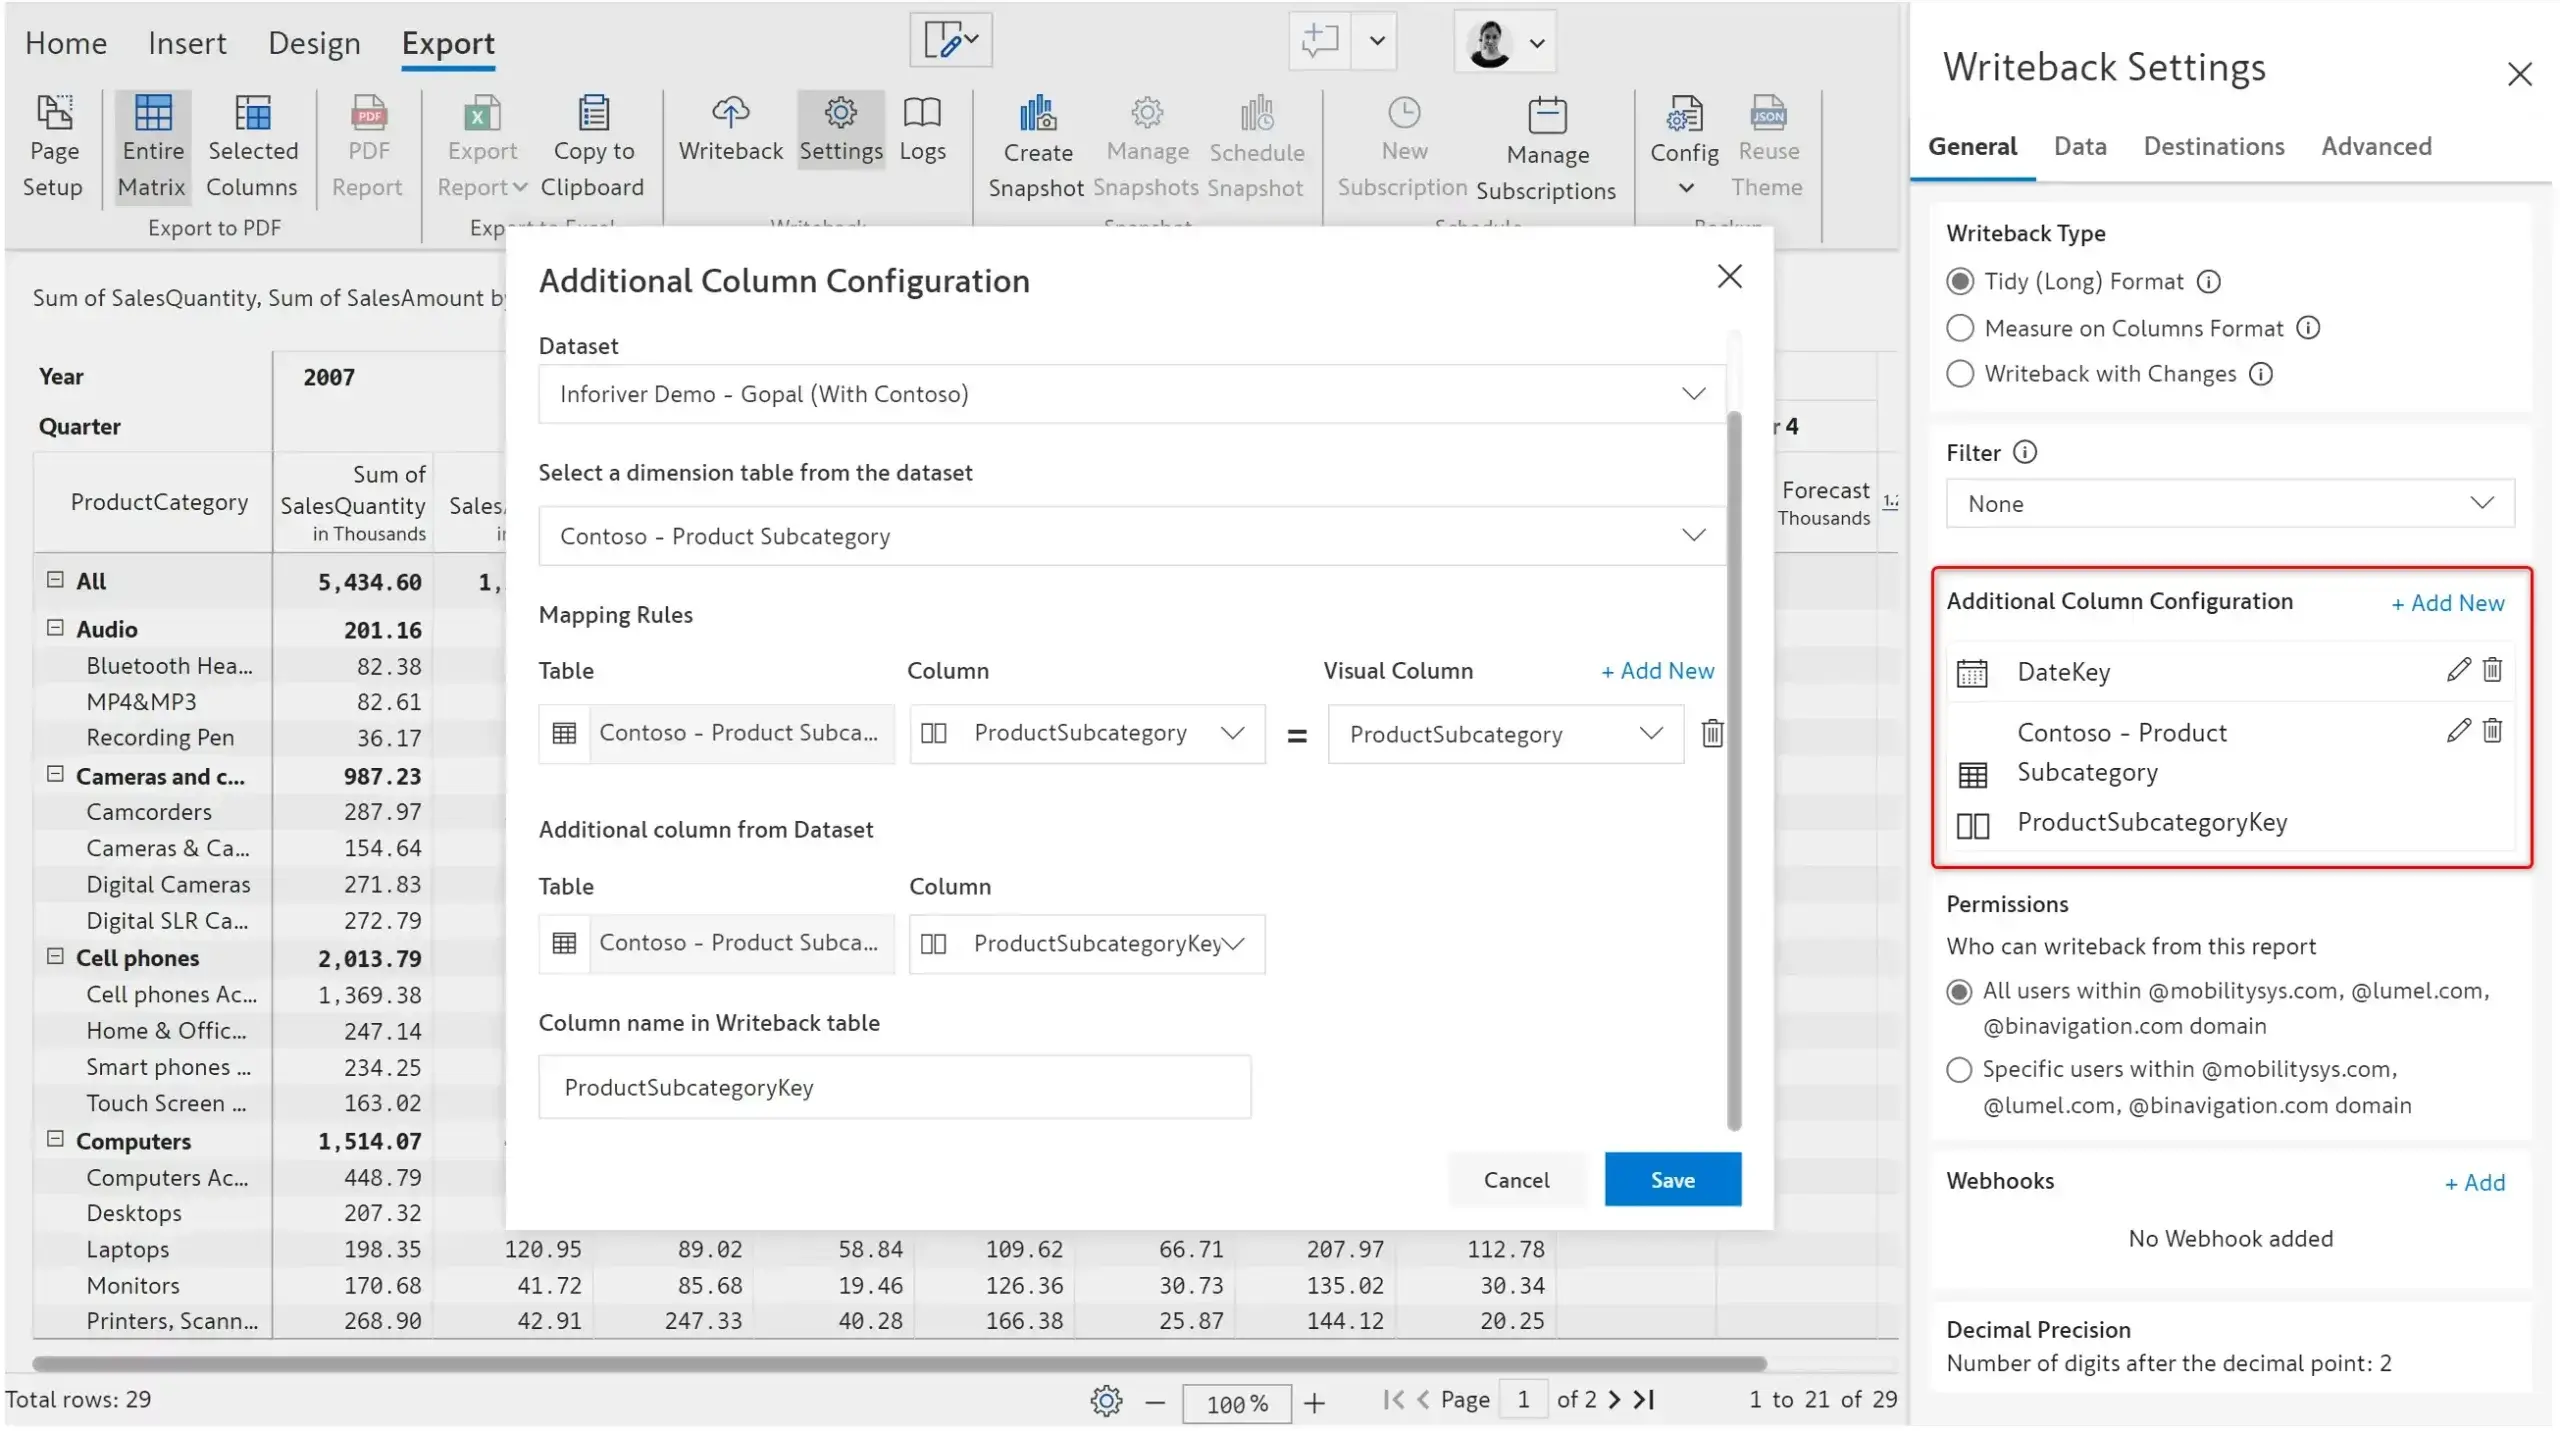
You can add columns to the writeback table to store the dimension/date keys. This column can then be used to create relationships between other tables in a composite model.
This works similarly to auto-save in Microsoft Excel and Word. Whenever Inforiver detects a change in the matrix, it writes back the data automatically. Note that only data input and simulated columns can be automatically written back, not source or calculated columns. Scenarios can also be configured to be automatically written back.

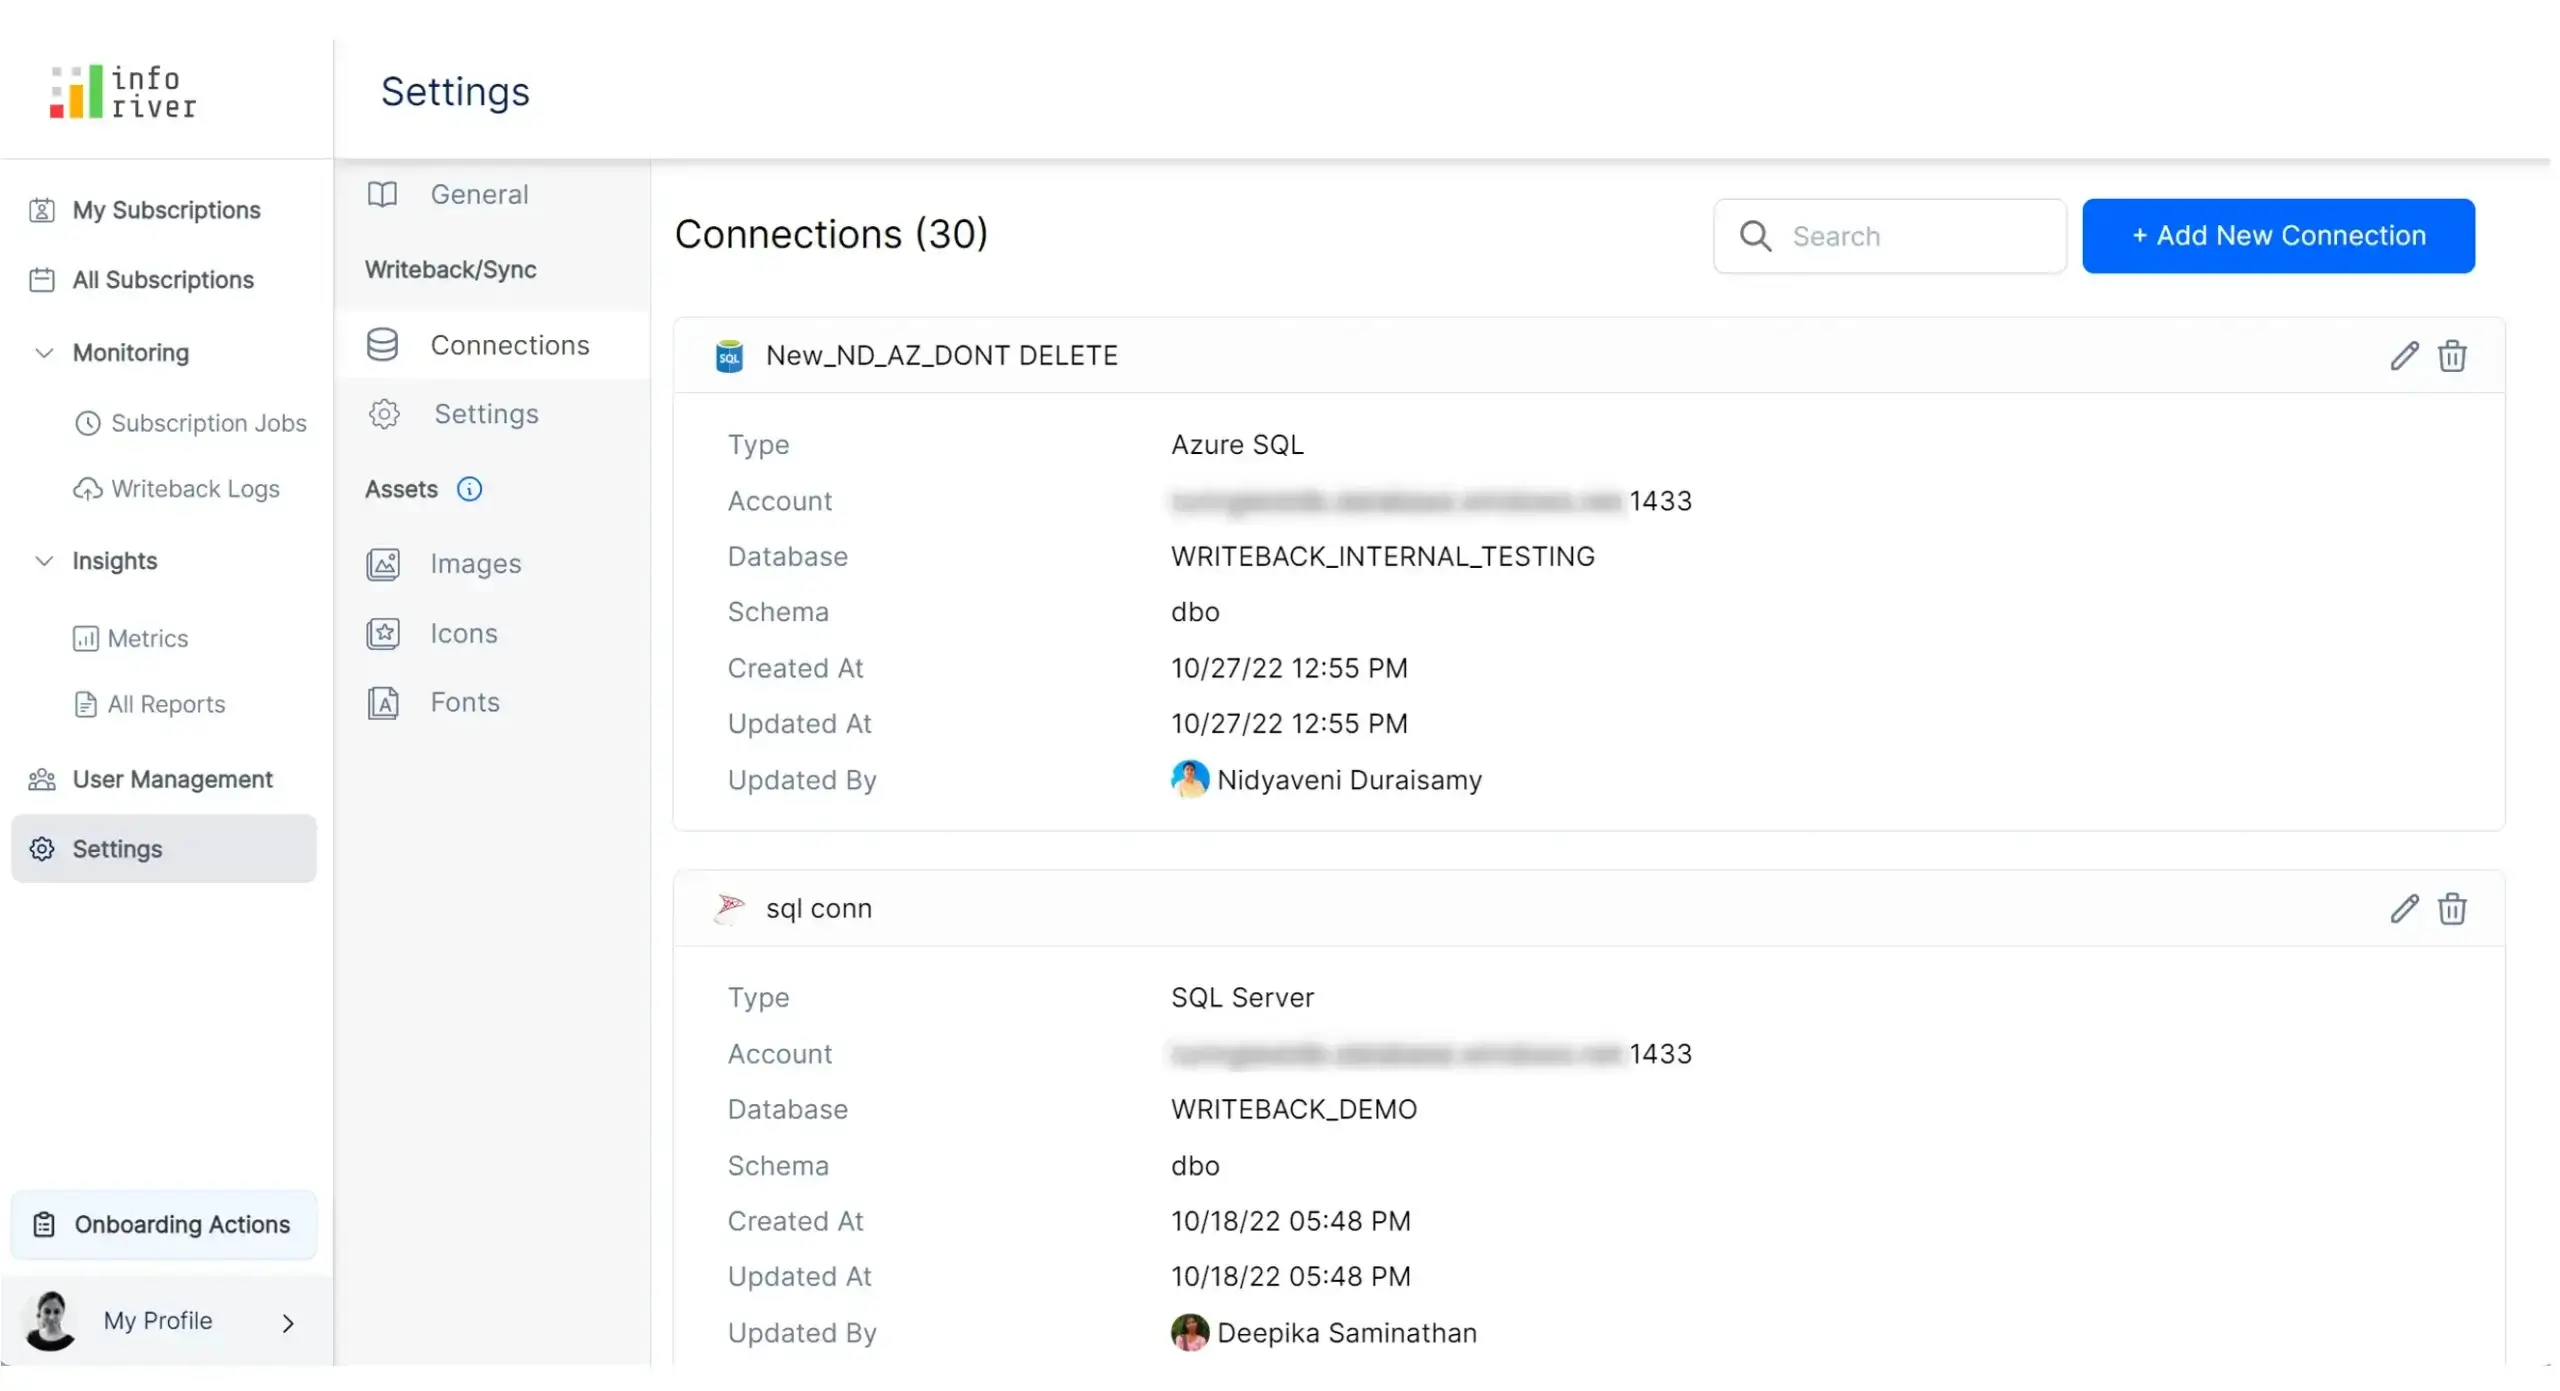
Admins can centrally configure writeback connections for use by other users. They can restrict or allow report authors from setting up writeback connections. Users/admins can manage connection details using ‘Edit Connection’, which updates all instances from the admin console.
One of the main benefits Inforiver offers is the ability to write back data without defining tables in advance. The SQL query for creating table definitions is generated by Inforiver and is executed in the destination. Note that Inforiver also supports structured writeback, where users want to write to specific tables in specific schemas that they have pre-created. This gives enterprises the flexibility to choose either option.
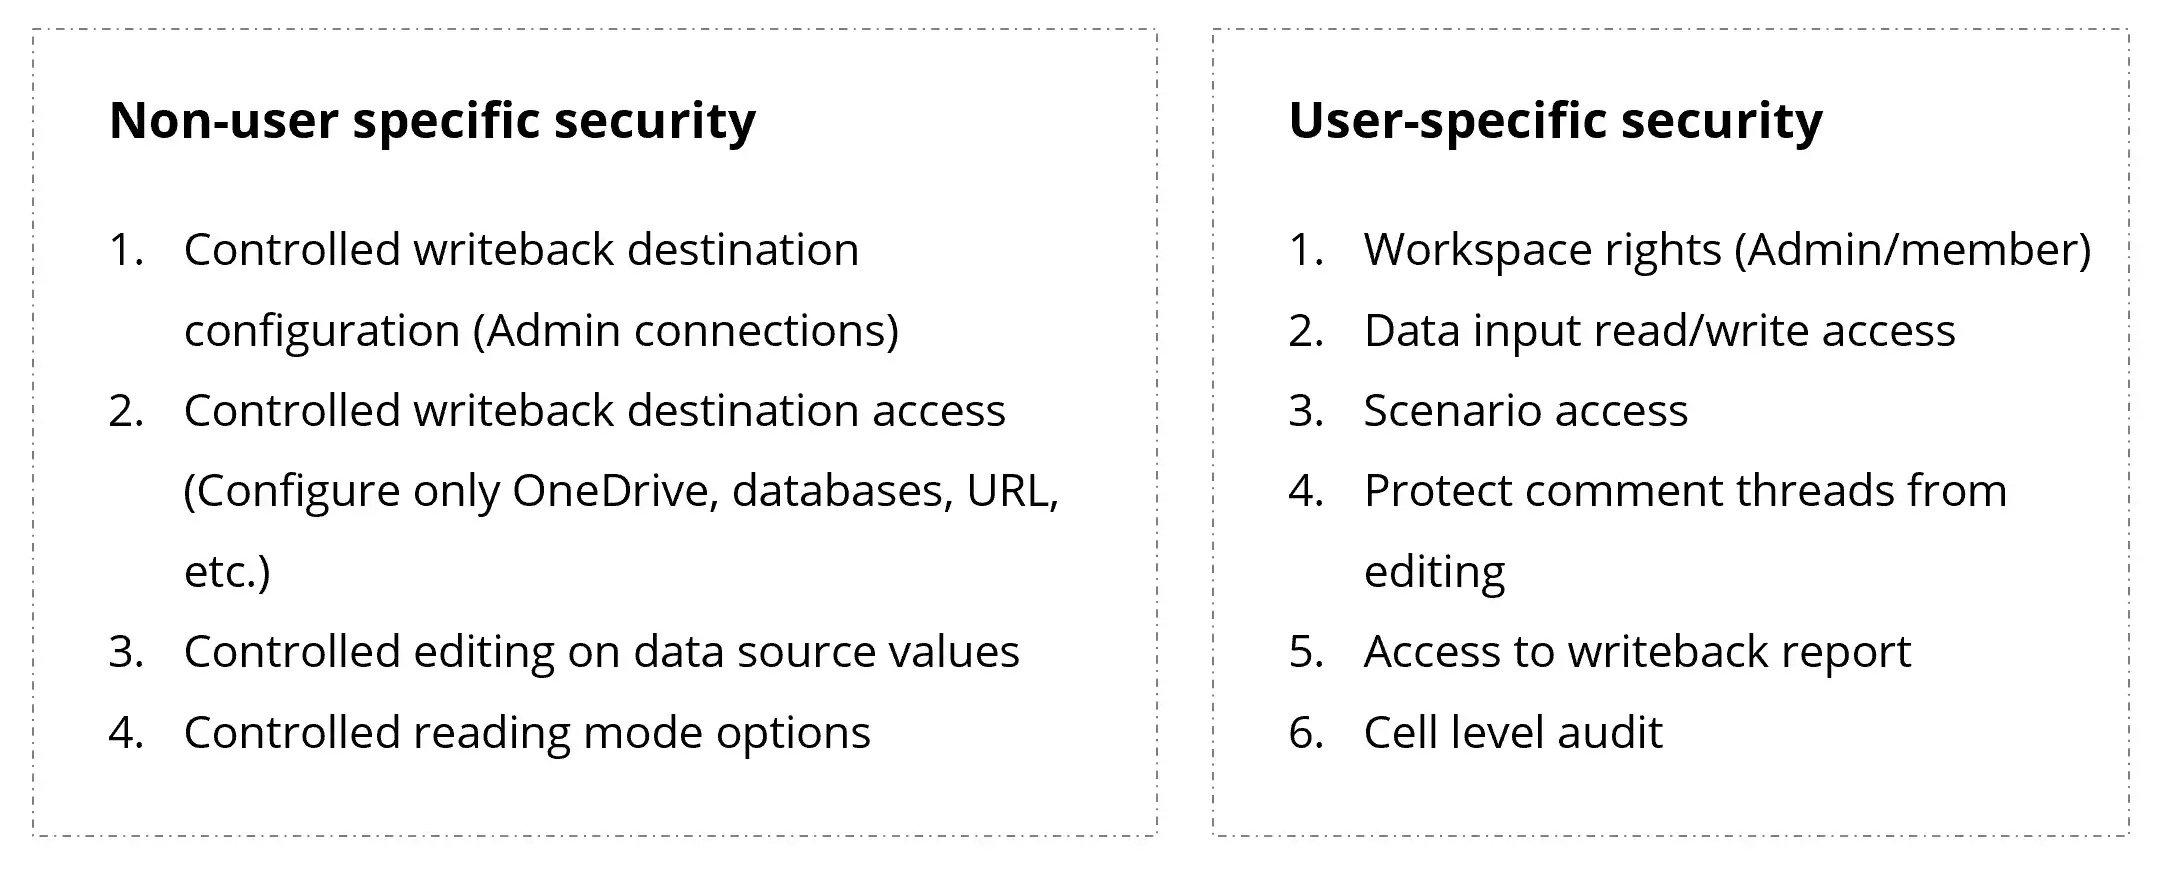
Inforiver offers multi-layered security features in addition to existing security settings at the Power BI workspace (edit/view rights) and dataset levels (RLS/OLS).
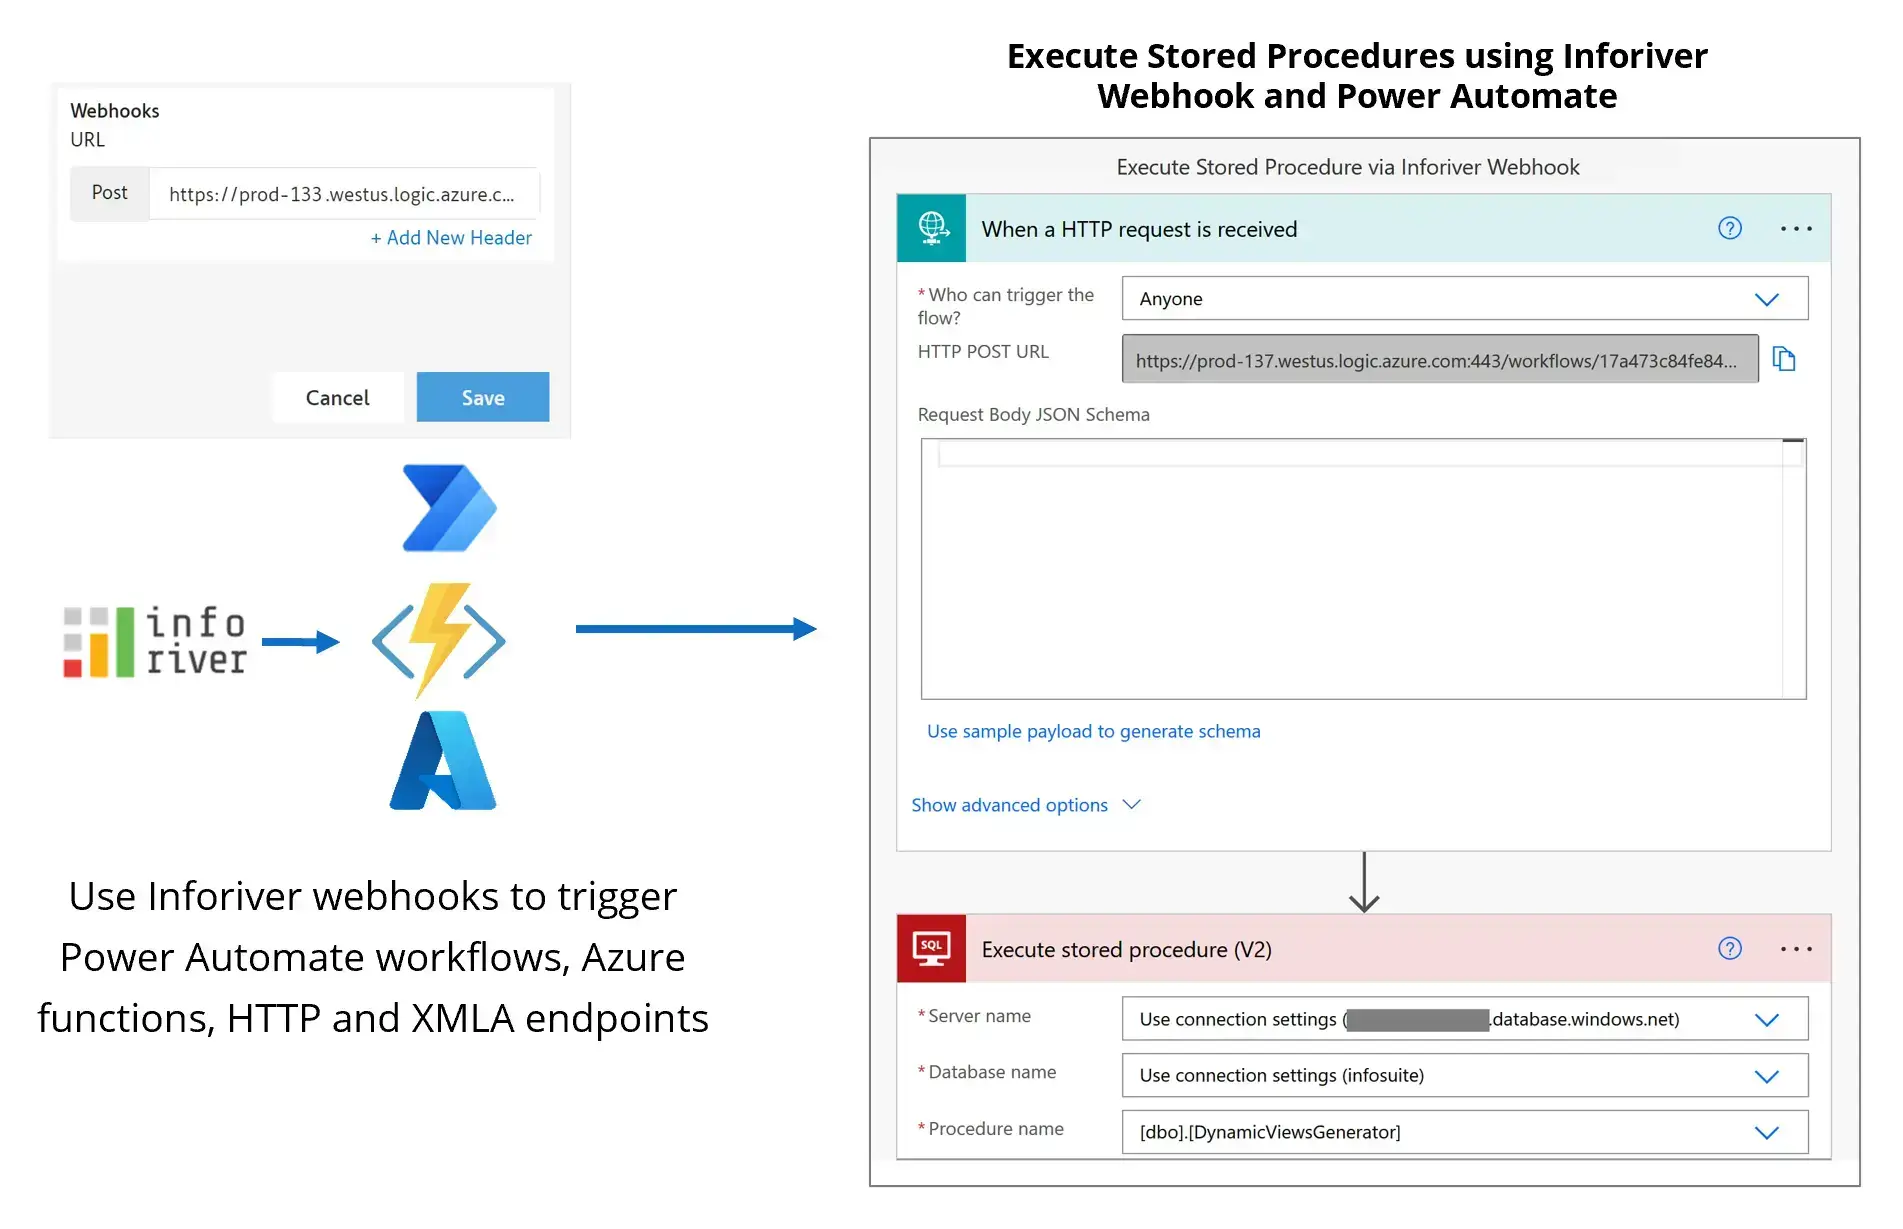
Use Inforiver webhooks to create smart flows for writeback to manage and control notifications, approval, and post-writeback data processing. It is a seamless no-code solution for Power BI Premium users. Watch this webinar to learn about Inforiver’s integrations with the entire Power Platform and Microsoft 365 ecosystem.

If you are evaluating multiple writeback solutions (including Inforiver, PowerApps and other third-party solutions), here are some key considerations to keep in mind:

Inforiver helps enterprises consolidate planning, reporting & analytics on a single platform (Power BI). The no-code, self-service award-winning platform has been recognized as the industry’s best and is adopted by many Fortune 100 firms.
Inforiver is a product of Lumel, the #1 Power BI AppSource Partner. The firm serves over 3,000 customers worldwide through its portfolio of products offered under the brands Inforiver, EDITable, ValQ, and xViz.