Upcoming webinar on 'Inforiver Charts : The fastest way to deliver stories in Power BI', Aug 29th , Monday, 10.30 AM CST. Register Now
Upcoming webinar on 'Inforiver Charts : The fastest way to deliver stories in Power BI', Aug 29th , Monday, 10.30 AM CST. Register Now
In this blog post series, we will focus on Inforiver’s advanced Writeback feature for PowerBI, i.e., the ability to write data directly from your Power BI reports to databases. We will particularly focus on its integration with the entire Power Platform and Microsoft 365 Ecosystem. In order to demonstrate the seamless integration and automation possibilities, we have created the following workflows using Inforiver Webhook, Power Automate and Microsoft Teams,
1. Create Approval Workflow for Inforiver Writeback
Manage writebacks including notifications, approval processes, as well as capturing and storing writeback metadata.
2. Refreshing Power BI dataset
Perform REST API based refresh operations on Power BI datasets/table/partitions
3. Creating custom partitions and refresh specific partitions
Create custom partitions within a table. Refresh specific partitions to load latest data into import only model thus saving refresh time and keeping the report up to date.
4. Creating relationships between writeback table dimensions and dimensions of original PBI dataset
Perform star schema modelling between a new/writeback table and dimension table in the original dataset without requiring PBI desktop for modelling.
5. Creating security roles and RLS rules in the original PBI dataset
Create new security roles in the PBI dataset, add or update DAX Security Filter Expressions without requiring PBI desktop.
We will start this series off by taking a dive into developing an approval workflow using Inforiver writeback, Automate and Teams. Please note, this workflow has a no-code experience all the way from setup to implementation. No other third-party products and licenses have been used. We have leveraged and maximized the automation potential using only Inforiver and Microsoft 365 Ecosystem.
While writing back data from a Power BI report to a destination, one may often require a workflow for verification (say, by a manager) before such data can be written back can be persisted.
In this article, we will explore how to create an approval workflow using Power Automate and Teams for data writeback in Power BI. These are the steps involved.
Download Inforiver Enterprise from Microsoft Appsource. Build your report based on the requirements.
Inforiver provides a wide range of options to enrich and enhance data available in your report through a highly engaging and user-friendly interface. You may do any of the following at the visual level, without writing DAX:
Here is an example where the user is enriching the report with custom fields at the visual level where data can be entered manually.
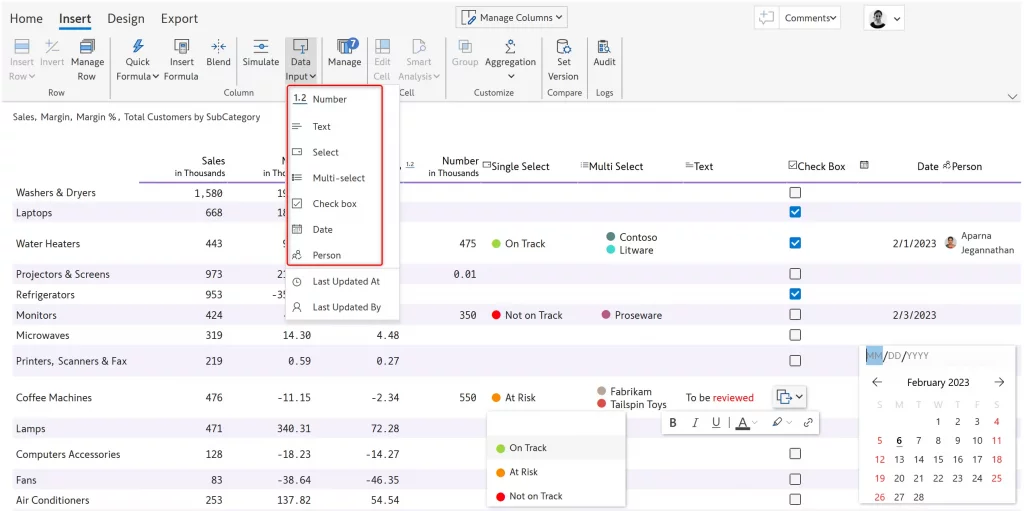
While performing writeback, we need to write back data in the visual along with these inserted rows, columns, comments and more.
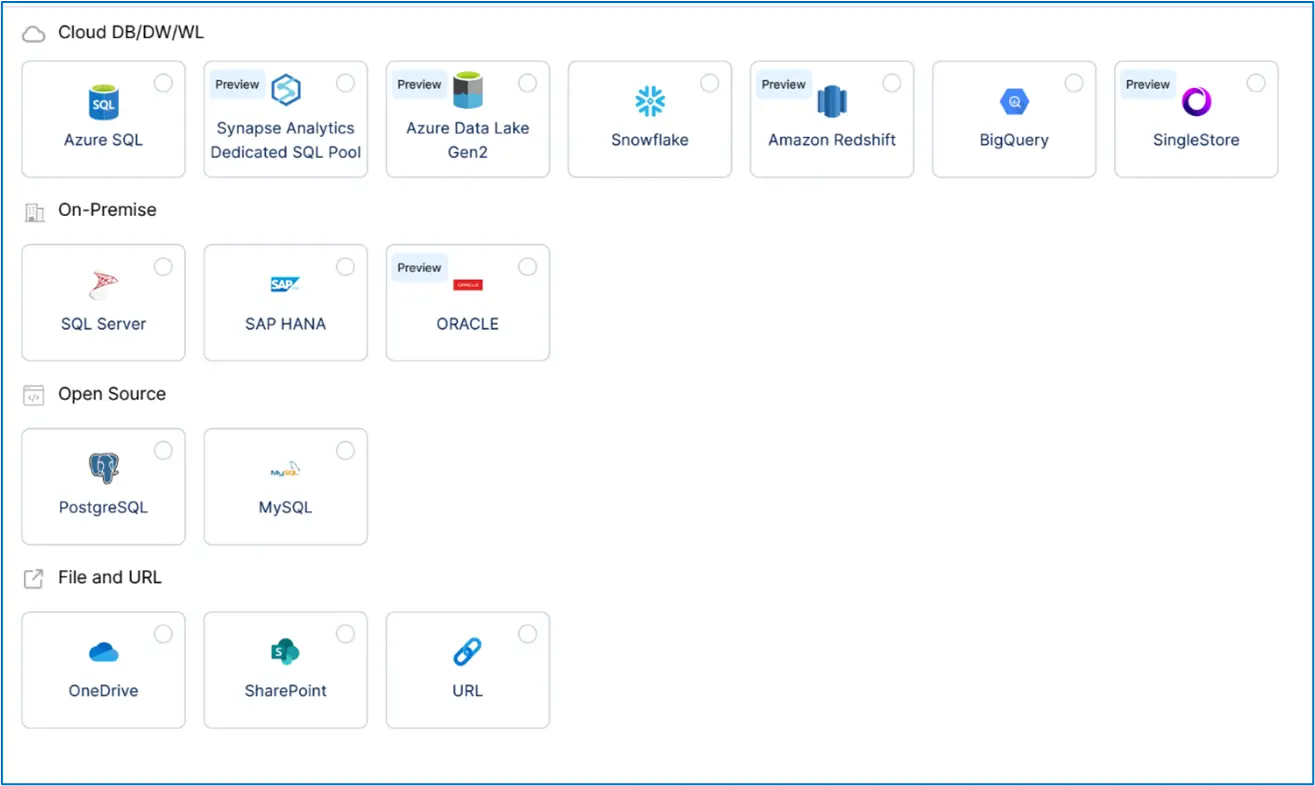
Inforiver Enterprise allows a range of options during writeback. First, choose a destination that includes Azure SQL/data lake, Snowflake, SAP HANA, BigQuery, RedShift and more.
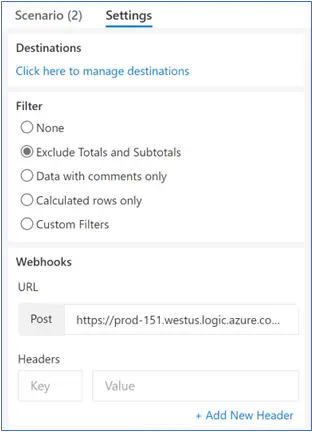
Since we need workflow approval prior to writeback, add a Power Automate HTTP endpoint URL which will trigger a Power Automate workflow. You can set it up in the Webhooks tab as shown below.
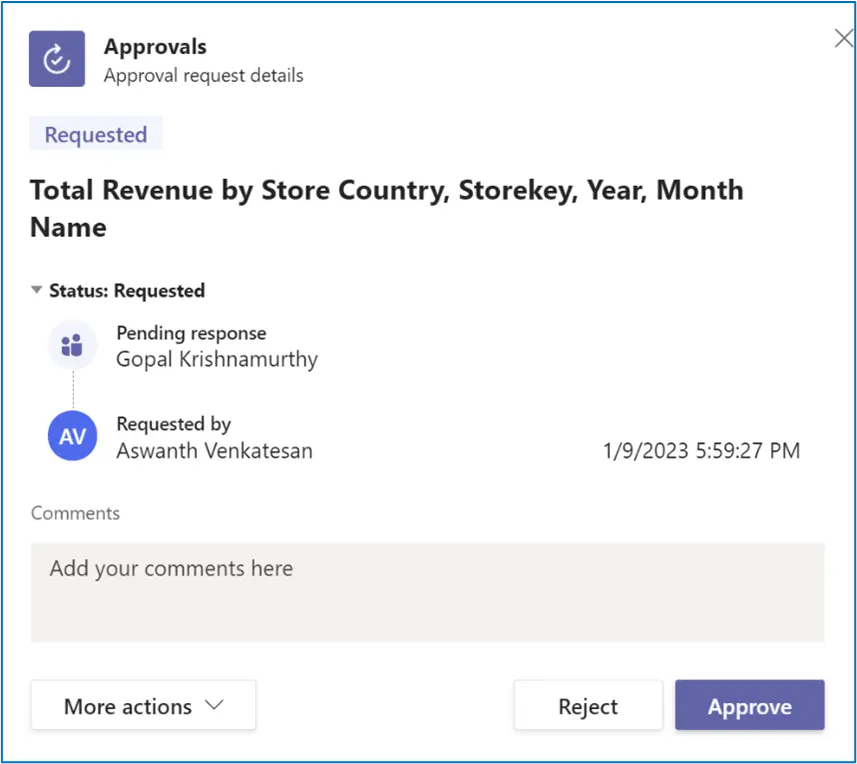
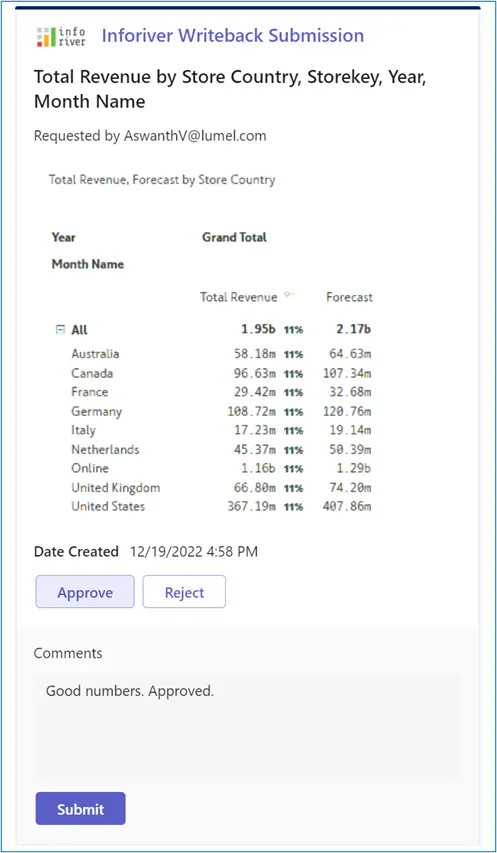
During writeback, the webhook provided in step #3 gets triggered. It sends the respective supervisor a custom approval card to his/her Microsoft teams chat window. The supervisor would then review to approve or reject the writeback request right from Microsoft Teams. The workflow approval metadata is also stored and captured as part of the writeback table. A SQL view or intermediate staging table can be created for further data processing and security.
Note that the approval card can be customized to include information including but not limited to
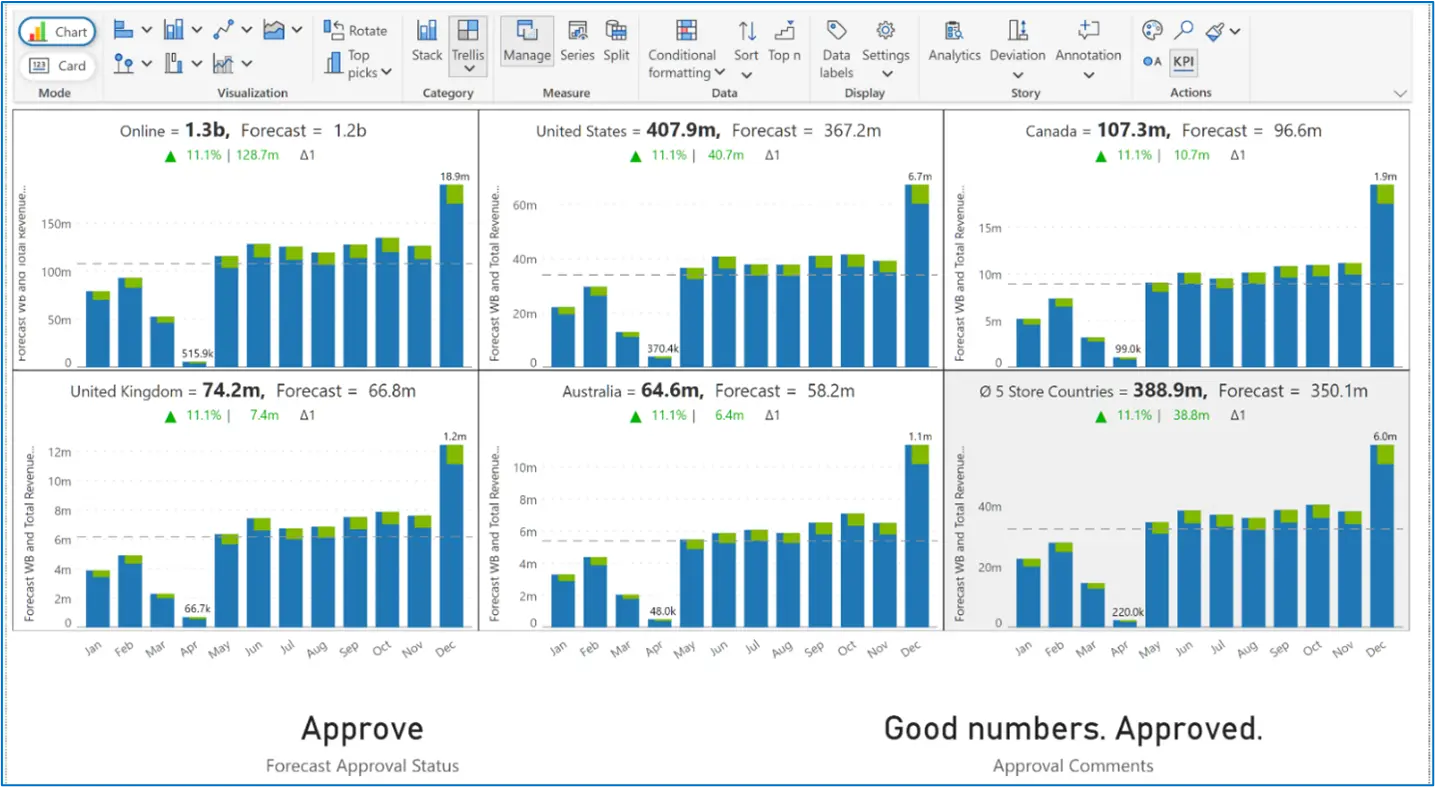
Once the data is written back, you may use it in downstream data models. You may use the approval metadata in your downstream reports too as shown below.
Here are some additional resources for writeback options in Power BI.
Inforiver helps enterprises consolidate planning, reporting & analytics on a single platform (Power BI). The no-code, self-service award-winning platform has been recognized as the industry’s best and is adopted by many Fortune 100 firms.
Inforiver is a product of Lumel, the #1 Power BI AppSource Partner. The firm serves over 3,000 customers worldwide through its portfolio of products offered under the brands Inforiver, EDITable, ValQ, and xViz.